Wildfire Segmentation on FPGA
To try the AI in One Ware Studio, simply click on the Try Demo button below. If you don't have an account yet, you will be prompted to sign up.
With the Download Project button you get the necessary files to run the model locally on your FPGA/PC.
About this demo
This demo evaluates wildfire segmentation in drone imagery deployed on an Intel Agilex 3 FPGA (ACX3000 board with an A3CY100BM16AE7S).
The setup uses 128 × 128 resolution at 100 MHz clock frequency, demonstrating real-time segmentation for autonomous drone surveillance systems where wildfire detection must happen onboard with minimal latency.
The model processes single-class segmentation (wildfire vs. background) using grayscale input, optimized for power-constrained edge deployment on FPGAs.
Comparison: DeepLabv3+ vs UNet vs Custom CNN
To evaluate FPGA deployment feasibility, we compared classical segmentation baselines with a task-specific model generated by ONE AI.
The Challenge with Universal Models
UNet requires 322.98 GFLOPs and 28.24M parameters, making FPGA synthesis impractical for real-time drone applications.
DeepLabv3+ (MobileNet backbone) reduces complexity to 17.63 GFLOPs and 10.99M parameters, but still exceeds typical FPGA resource budgets for embedded vision systems.
The Solution with ONE AI
Using ONE AI, we generated a custom CNN optimized for this exact use case: single-class wildfire segmentation, 128×128 grayscale input, and FPGA deployment.
The resulting architecture has only 7,705 parameters and requires just 0.05 GFLOPs, achieving 95.2 FPS on Intel Agilex 3 at 100 MHz while maintaining segmentation quality suitable for fire detection.
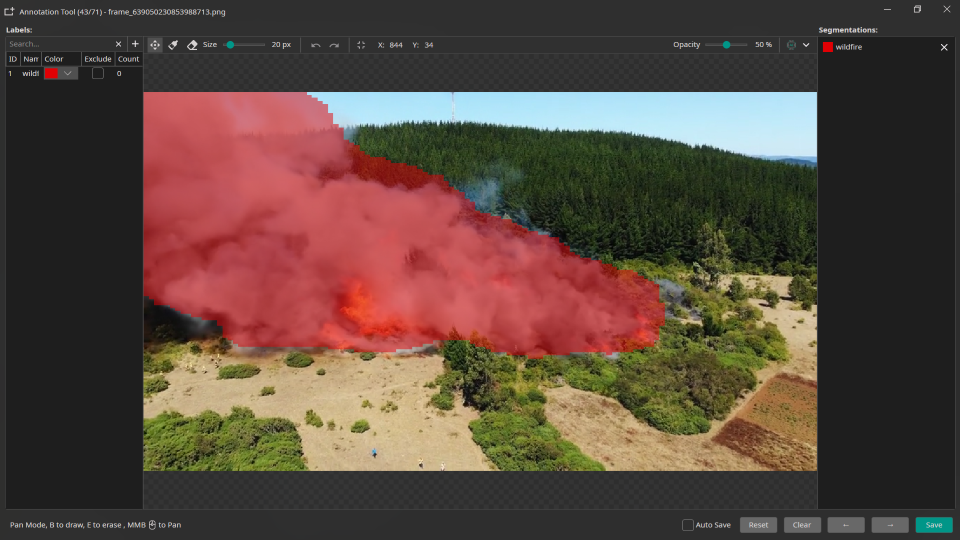
Segmentation result with ONE AI on FPGA.
Results
| Model | Parameters | GFLOPs | Avg CPU Speed | Max. FPGA Speed* |
|---|---|---|---|---|
| ONE AI | 0.01 M | 0.05 | ~600 FPS ** | 95.2 FPS |
| DeepLabv3+ | 10.99 M | 17.63 | 12.7 FPS | ❌ |
| UNet | 28.24 M | 322.98 | 0.44 FPS | ❌ |
* On Intel Agilex 3 @ 100MHz
** A quantized TFLite model was used for the CPU benchmark.
FPGA Resource Usage
Device: Intel Agilex 3 (A3CY100BM16AE7S)
| Resource | Usage | Percentage |
|---|---|---|
| Logic (ALMs) | 3,167 / 34,000 | 9% |
| RAM | - | 15% |
| DSP Blocks | 53 / 138 | 38% |
The low resource footprint enables integration with additional processing pipelines (image preprocessing, post-processing, communication interfaces) on the same FPGA fabric.
Model Configuration
A more detailed guide on how to obtain a segmentation model with ONE AI can be found in this Guide
The following ONE AI plugin settings were used for this FPGA-targeted wildfire segmentation pipeline.
Data Processing
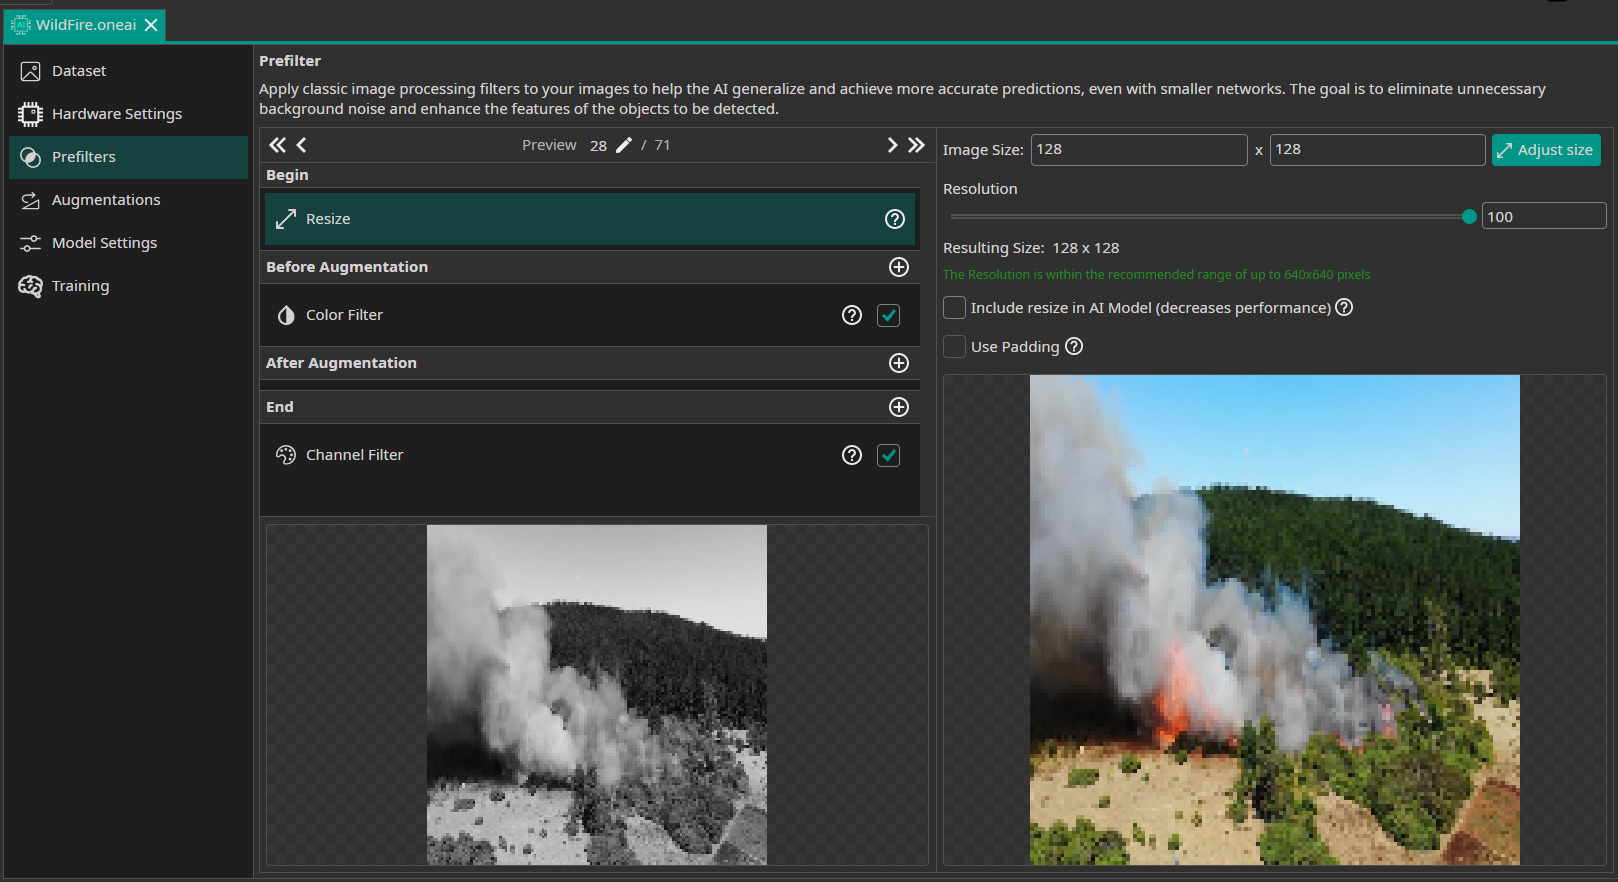
The model uses grayscale input (single channel) to reduce computational complexity. Images are resized to 128×128 and converted to grayscale before augmentation.
Model Settings
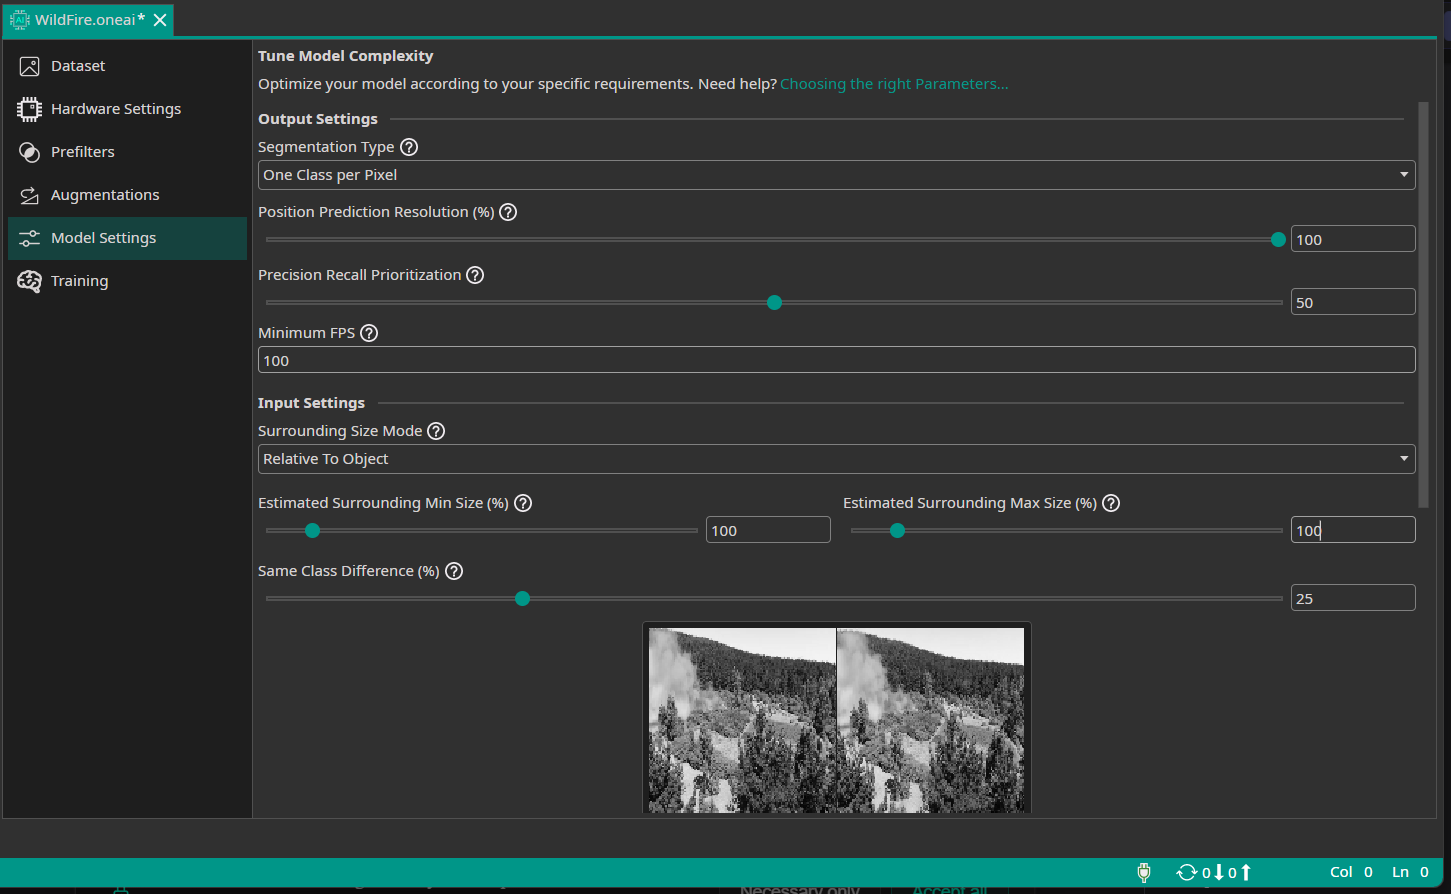
The segmentation output resolution was set to 100% for pixel-accurate masks, while the model architecture remains compact enough for FPGA synthesis at 100 MHz clock frequency.
Conclusion
This setup targets real-time drone surveillance with a single segmentation class (wildfire).
FPGA deployment enables:
- Low latency (< 11ms per frame at 95 FPS)
- Deterministic timing for safety-critical applications
- Low power consumption for battery-powered drones
- Parallel processing with other onboard perception tasks

Need Help? We're Here for You!
Christopher from our development team is ready to help with any questions about ONE AI usage, troubleshooting, or optimization. Don't hesitate to reach out!