Common Problems and their Solutions
No viable configuration found for current hardware constraints
You might have seen the following error message:
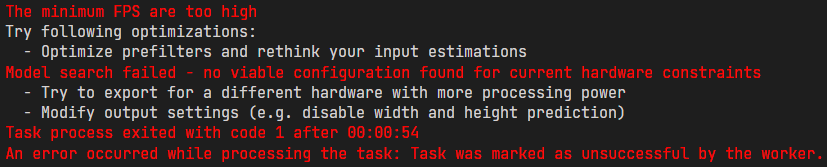
As the message says, it wasn't possible to find a model that solves your task while also fitting the hardware constraints. There are a two ways to resolve this conflict:
You can reduce your hardware constraints by
- selecting a more powerful hardware in the Hardware Settings
- increasing the Maximum Memory and Multiplier Usage in the Model Settings
You can reduce the amount of computations required to run the model by
- reducing the resolutions of the input images with a Resolution Filter or a Crop Filter in the Prefilters tab
- changing the Prediction Type in the Model Settings if you are working on an object detection tasks. If you only predict the position of objects, your model is going to need fewer resources.
- reducing the X/Y and Size Precision in the Model Settings (only for object detection)
- reducing the Minimum FPS in the Model Settings
- reducing the Same Class and Background Difference in the Model Settings
- increasing the Detect Simplicity in the Model Settings
My model performs good during training but bad in the evaluation
It is expected that your model performs slightly better on the training data since this is the data the model was trained on. If there is a large difference between the training and evaluation performance, however, this can have two causes:
Discrepancies between the training and test data
When you split your dataset into training and test subsets, you need to pay attention that your training data is representative of the test data. If your test data contains situations or conditions that aren't present in the training data, your model is going to perform worse. This might happen if you sort your data by the time it was recorded and split it at a chosen point in time. If you recorded the training set in the morning and the test set in the afternoon there might be different lighting conditions. It might also be that you mainly captured unusual or hard examples in the afternoon because they were sorted into the same bin.
Overfitting
If your training set is representative of your test set and the model still performs better during training, you are experiencing what is called overfitting. Your model is learning minute details or even the noise of your training data which increases its accuracy on the training data but harms its generalization abilities. You might have also noticed that your validation loss starts increasing at some point during the training, while your training loss kept going down:

To reduce the amount of overfitting, you can try the following approaches:
- Reduce the complexity of your model: When your model increases in size and complexity it becomes more prone to overfitting. You can reduce the model complexity by going to the Model Settings and increasing the Detect Simplicity, reducing the Same Class and Background Difference or reducing the X/Y and Size Precision for object detection tasks.
- Increase the amount of training data: If your model needs to fit to more data, it becomes harder for it to focus on individual details, so the amount of overfitting decreases. You can increase the amount of training data by recording and labeling additional images, but, since this is expensive, it is probably easier to use data augmentation. When we apply data augmentation to our images, we alter them in a way that produces realistic examples and preserves the annotations. For example, we can rotate or shift the images to gain a new image and increase the variance of our dataset. Because we can transform the annotations in the same way, we don't need to annotate the new images. You can find more information about the augmentations that are available in the OneAI extension here.
- Use Early Stopping: In training runs where overfitting occurs, the model usually starts out good before it overfits. We can observer this when we look at the validation loss: it decreases alongside the training loss in the beginning before plateauing and finally increasing in the end. Meanwhile, the training loss continues decreasing the whole time. When we start the model training, we can enter a Patience for early stopping. If the validation loss doesn't improve for the specified number of minutes, the training is terminated early. This way, we can stop the training before the overfitting starts to negatively effect our model. Furthermore, we avoid unnecessary training even when we wouldn't encounter overfitting.
My validation loss increases even though my training loss is decreasing
This observations means that your model is overfitting. You can find tips on how to avoid overfitting here.
My model performs good during the evaluation but bad after deployment
Your model performing good on the validation and test data but significantly worse during its actual deployment is most likely caused by on of the following two reasons:
Your dataset doesn't reflect the deployment conditions
The most probable reason for the bad performance is that your dataset doesn't reflect the conditions of your deployment environment. Since the data is too different to the training data, the model has a lower certainty and makes worse predictions. You can look at the images from your deployment environment and compare them to the training images. Pay attention to the lighting conditions, the image background, the camera position and the size of the objects in the image. It might also be that you are encountering different or unusual examples. Maybe the design of the product changed or you are encountering defects that aren't present in your dataset. It is also a good idea to specifically look at the images with which the model struggles and to try to identify the cause.

An example from the training set of our Handwritten Digit Classification Demo.

An example of how the images might look during deployment. The background isn't perfectly white and the number isn't perfectly black. Furthermore, this example uses squared paper, which adds a texture to the background.
If you find structural differences, you have a few different options to improve your model's performance. The easiest approach would be to use filters and data augmentations to replicate the conditions of your deployment environment. For example, if you notice that differences in the lighting conditions cause issues, you can try to recreate them with a Color Filter in the Prefilters tab or a Color Augmentation in the Augmentations tab. Alternatively, you can apply filters to your deployment images before feeding them into the model, but since adding additional filters to an existing model isn't supported by OneWare Studio at the moment, you would need to implement your own solution.

The effect of applying a Color Augmentation to the NIST sample.

Applying a Normalize Filter, a Color Filter and a Threshold Filter to the recorded deployment image.
If the differences can't be recreated with augmentations, you need to record additional data. If your model just struggles with certain problem cases, you can try adding samples from those cases to the dataset and retraining the model, but if your model struggles with most inputs due to a major change in conditions, you might need to capture a completely new dataset.
You have an information bleed between the train and test set
If there aren't noticeable changes between the training and the deployment data, it might be that you accidentally bled information from the test dataset into the training dataset. One possible case where this occurs is when you have multiple images of the same defective sample, e.g. multiple images taken from a video of the object riding on a conveyor belt. OneWare Studio splits the dataset into random subsets so it is possible that images of the same defective sample end up in both the train and the test set. Because of this, the results of the test metrics don't reflect the model performance on new samples but only on new images of the known samples.
To get a more realistic evaluation of the model's performance you need to redo your dataset splits and ensure that there is no information bleed between the splits. Afterwards, you need to retrain your model. Since it was performing well on the data it had seen but bad on new data, it might be that you are encountering overfitting. You can find tips on how to avoid overfitting here.
The live preview of the camera tool always predicts Undefined Label
If the prediction of the live preview always shows Undefined Label, you probably haven't named the labels of your dataset. You can do so by going to Dataset > Labels and right clicking on the label you want to rename. You can also assign individual colors to the different labels.

My webcam looks differently since using OneWare Studio
If you set up a camera preset in OneWare Studio it can happen that the camera settings persist after leaving OneWare Studio. You can reset them to the system default in the Windows Settings > Bluetooth & devices > Cameras > [your camera]. Move all sliders by a small amount, then click on Reset settings. Windows won't realize that a setting was changed by another application and thus not reset it unless you move the corresponding slider.