Teacup Print Detection Demo
About this demo
This demo shows you how to build a simple object detection model, just by taking some photos of an object with a highly varying background. If you are unfamiliar with the OneAI Extension, we recommend to first take a look at our guide Getting Started with One AI. In this guide you will learn how to handle such small and highly variable datasets and how to properly use pre-filtering and augmentation to find a model that solves this problem quite well.
This demo was also part of an online webinar, which was later uploaded to YouTube. You can watch it here.
Dataset overview
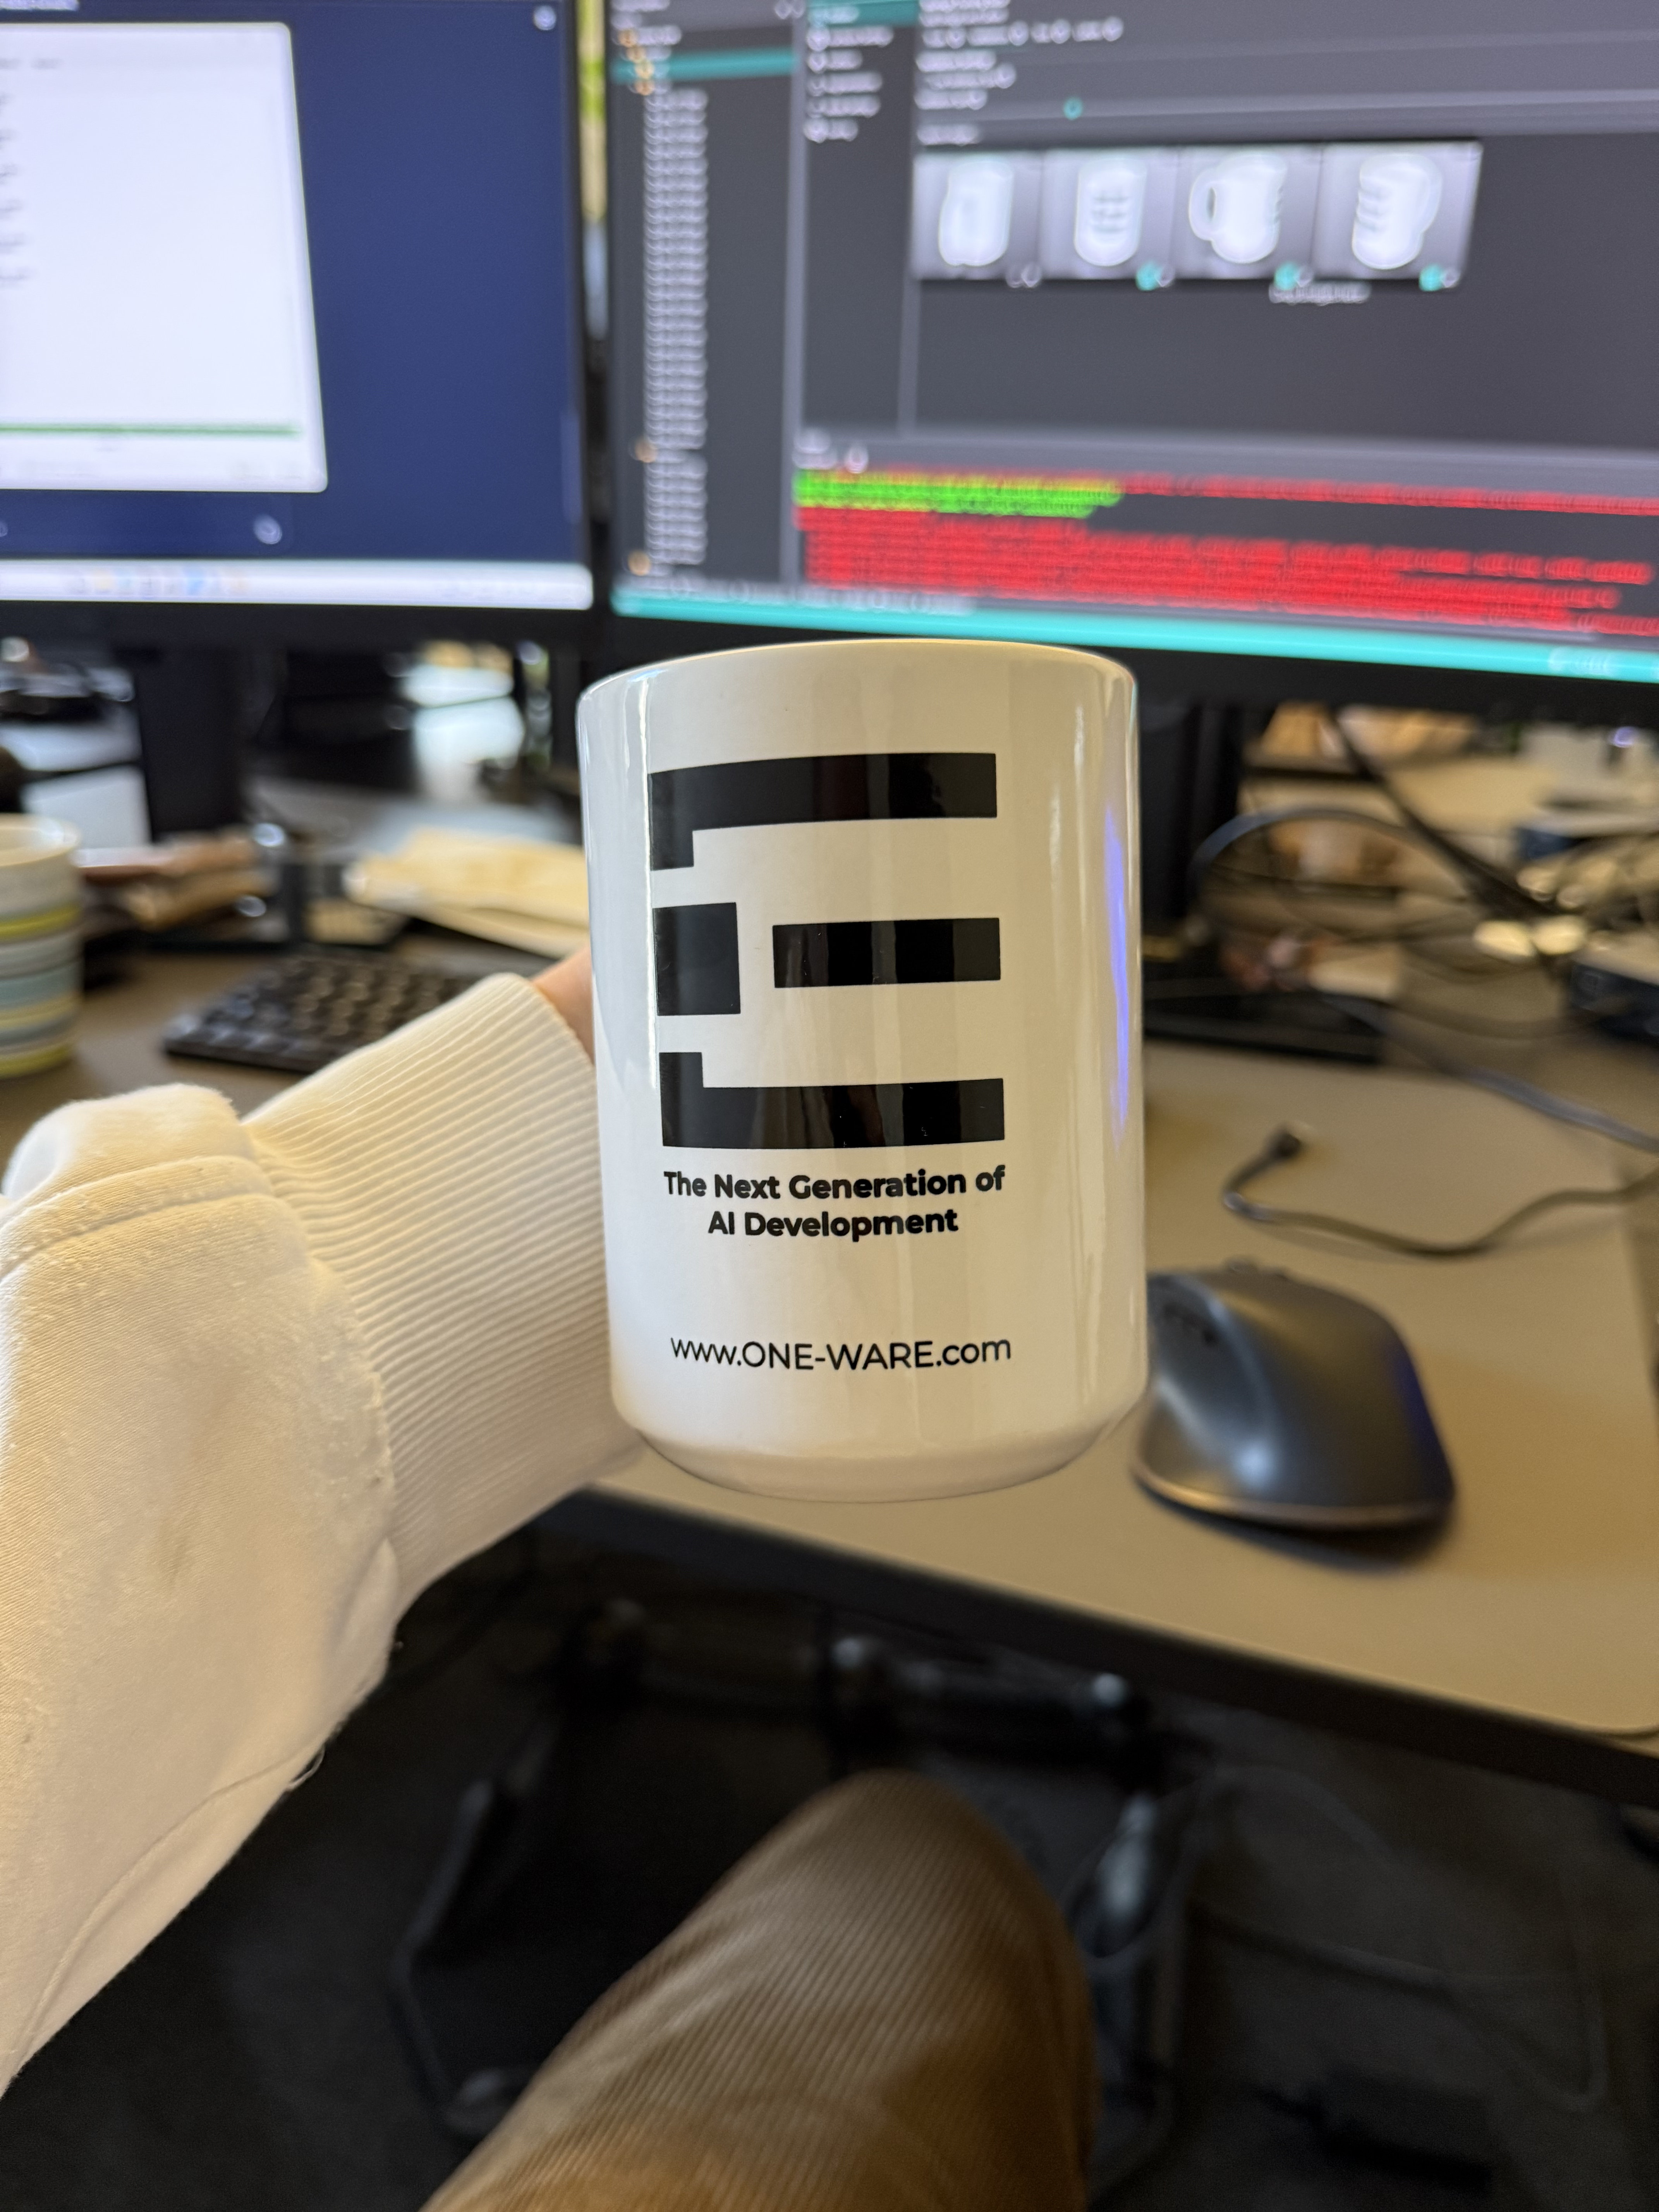
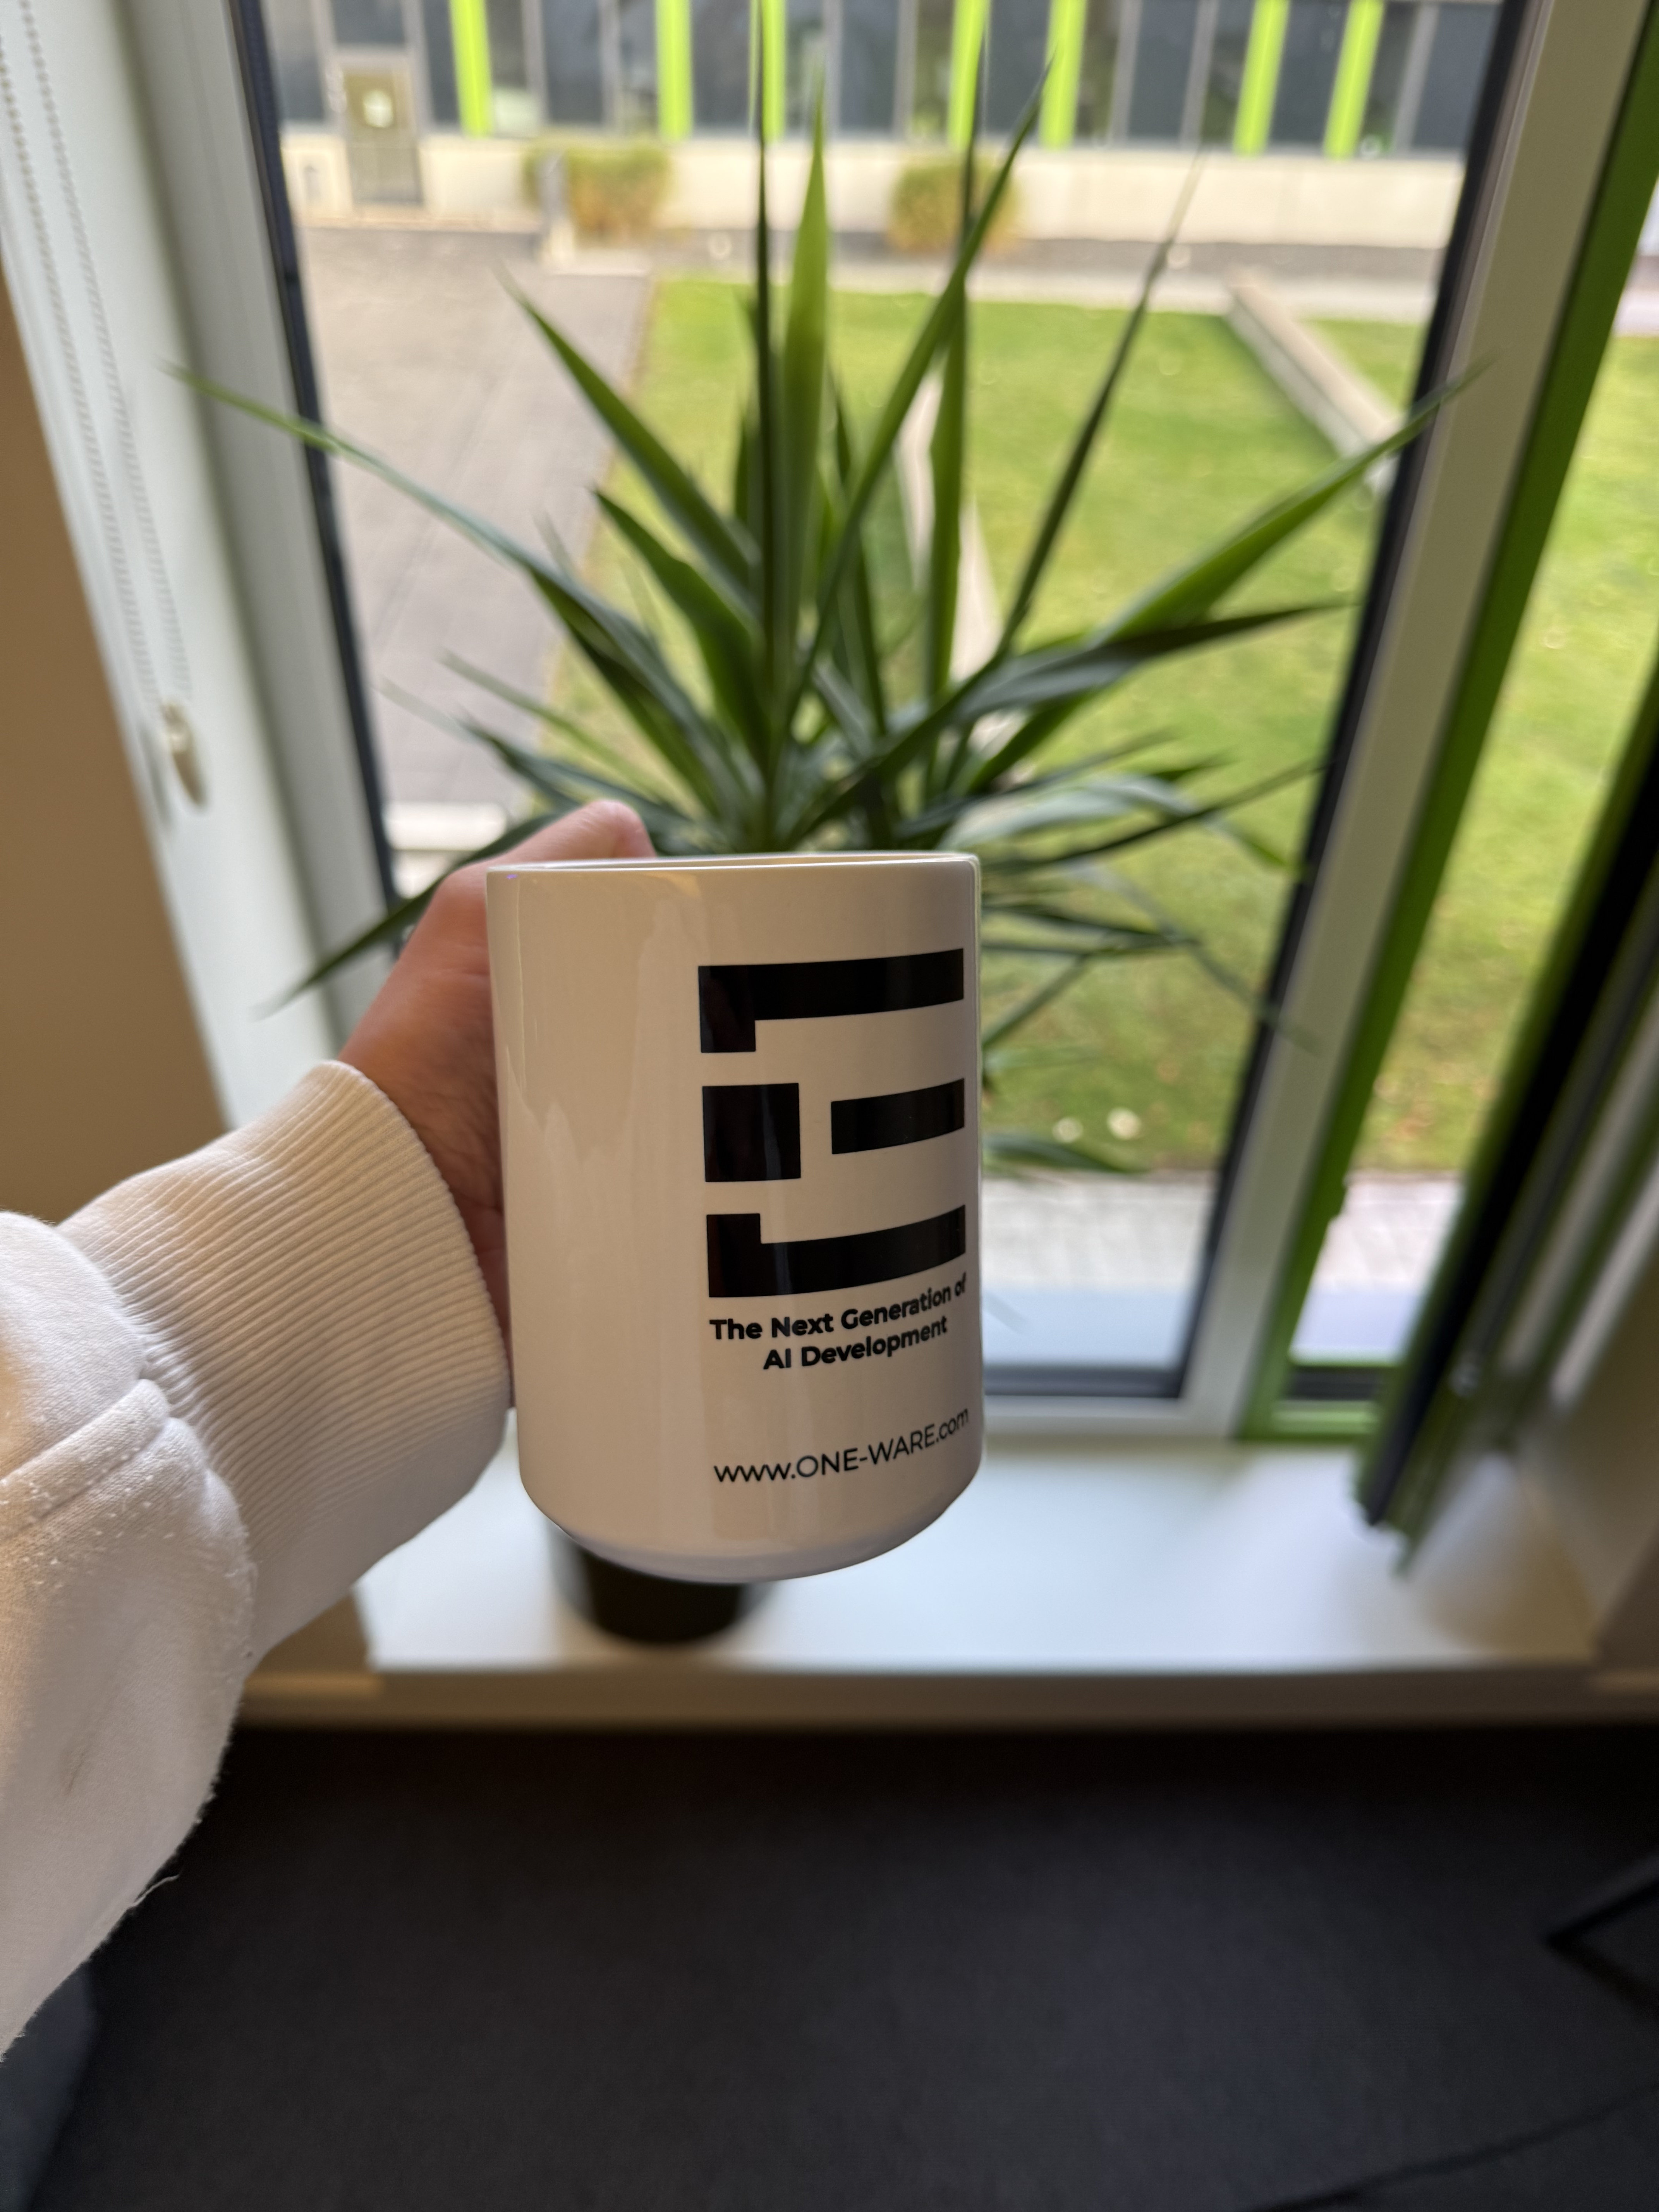
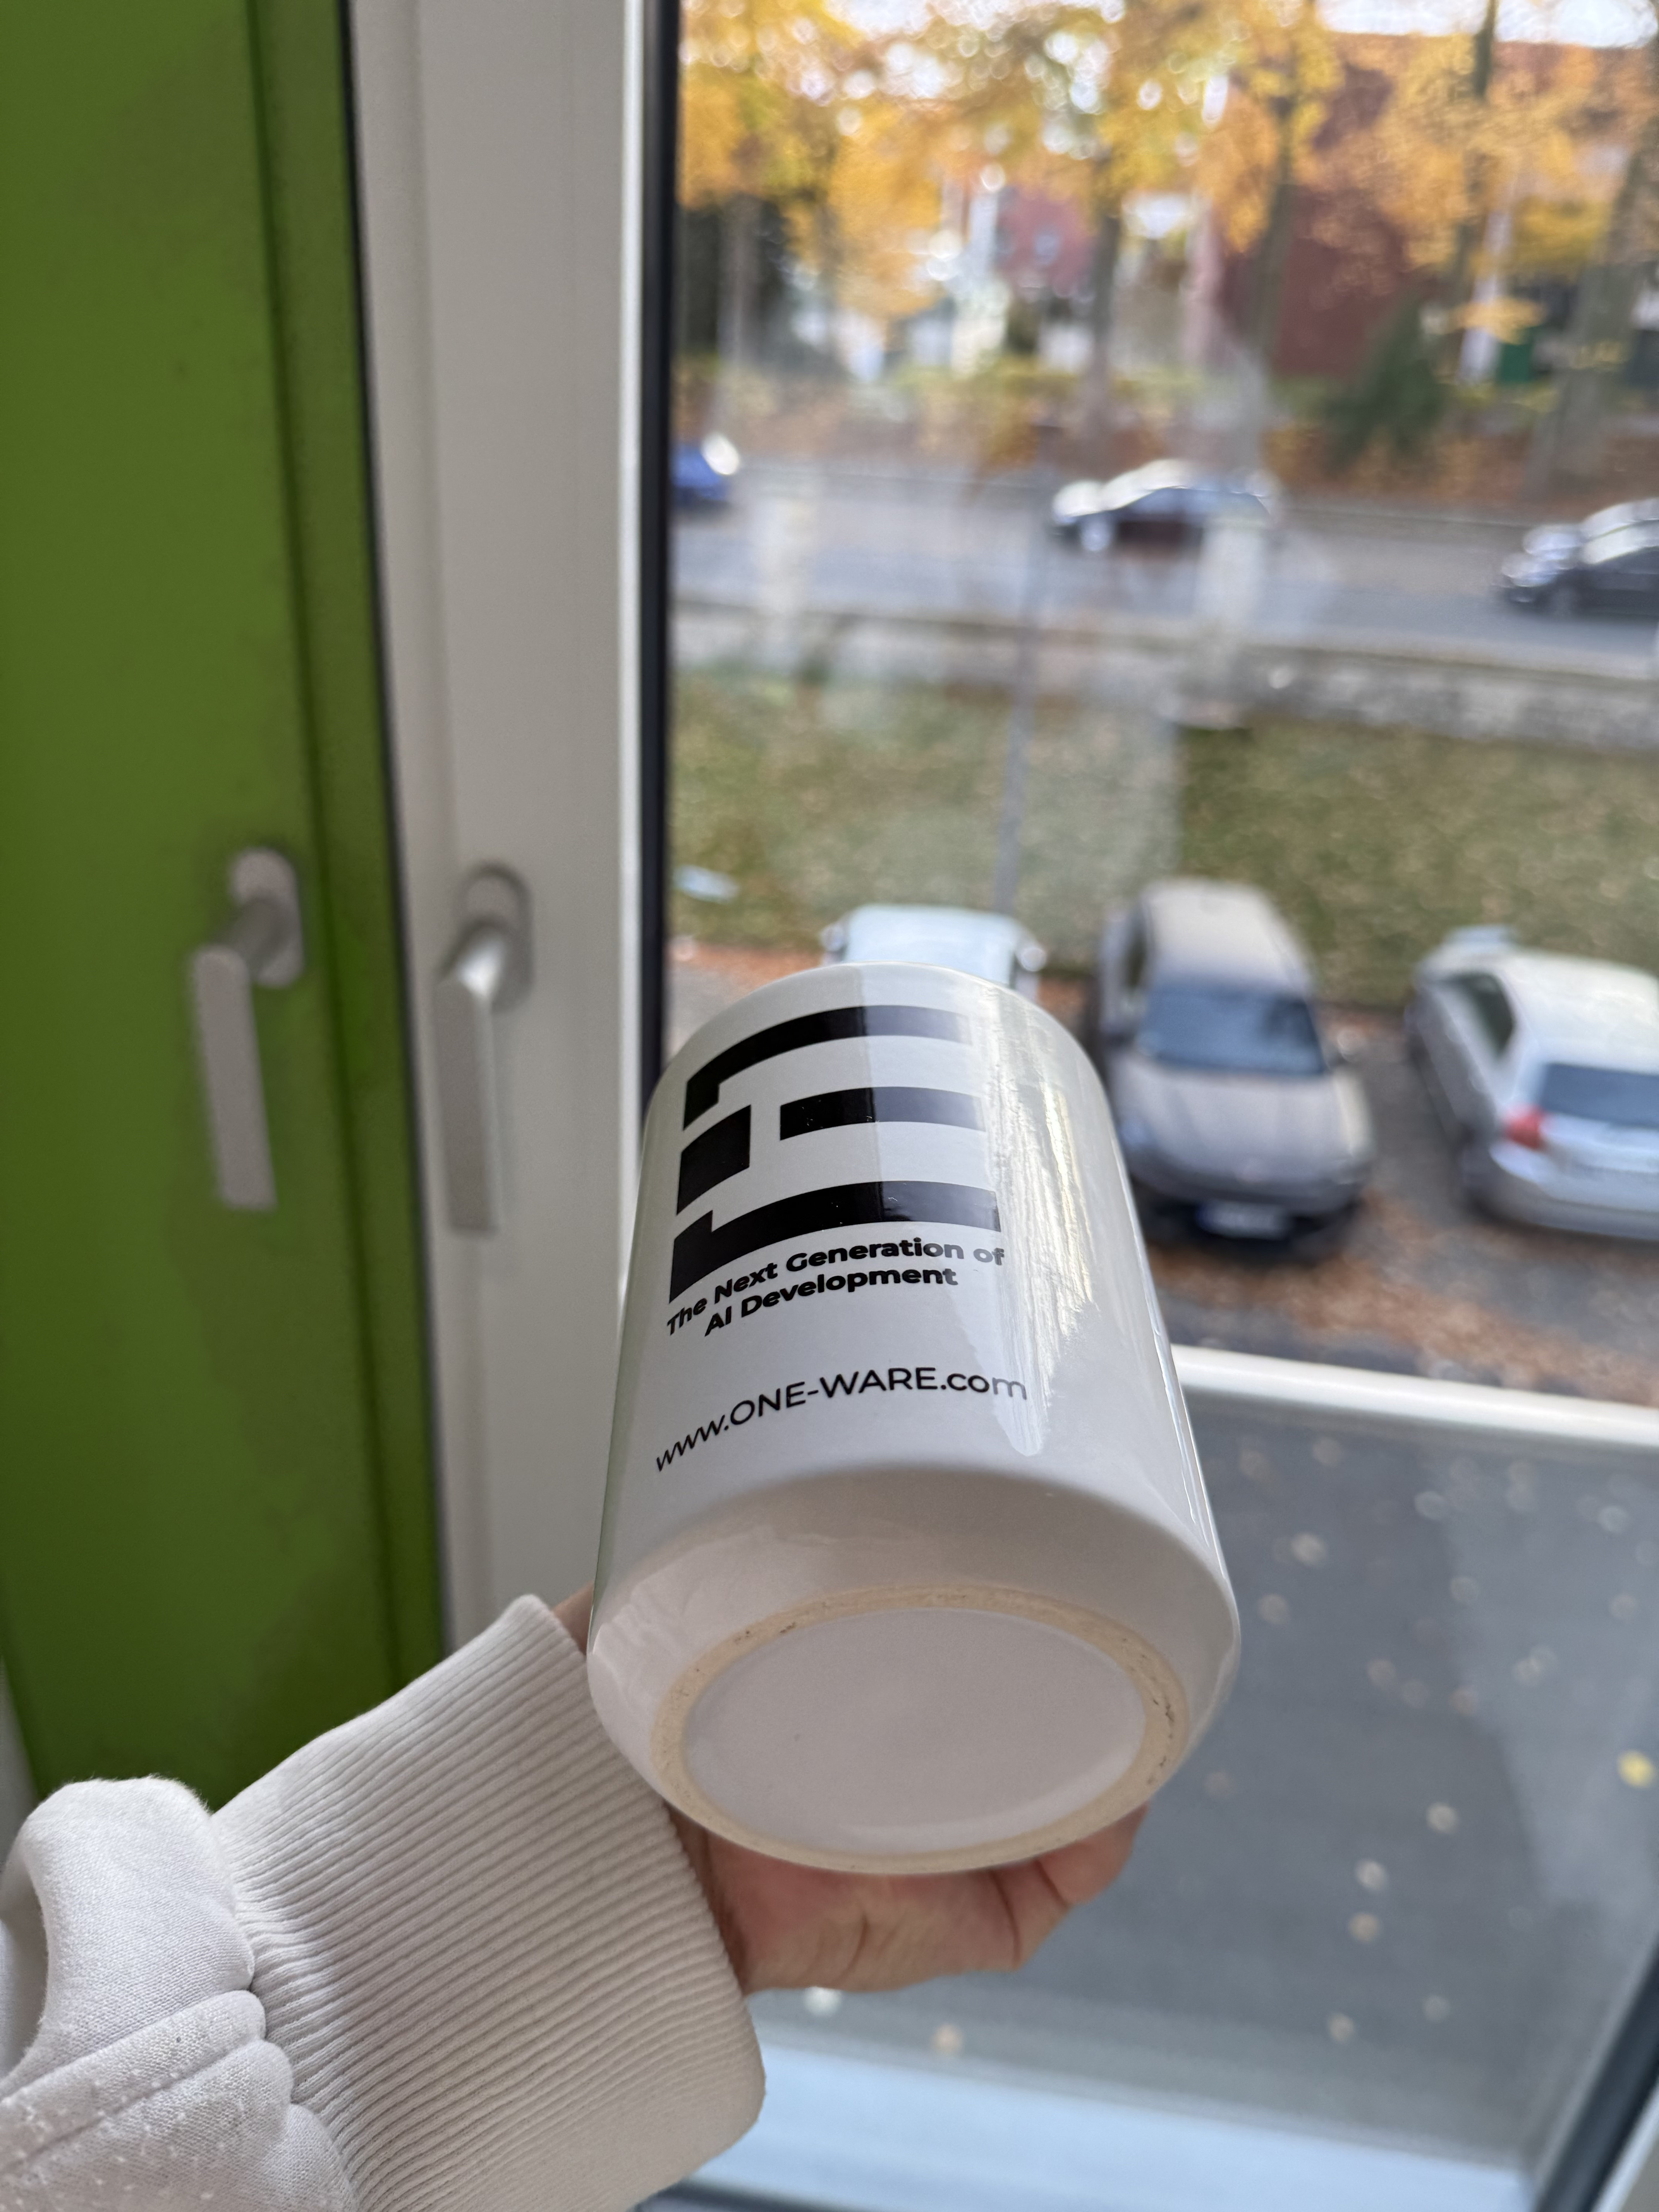
For this tutorial, we created our own small dataset of teacups with a print of the One-Ware logo. The cups vary in size, positioning, rotation, and background. The pictures were shot using an iPhone 16 Pro while holding the cups in different positions. The background varies strongly, e.g., in front of a monitor or a plant. We shot a total of 20 pictures, which we manually split into train, test, and validation sets. Additionally, we scaled the pictures down from 4284 x 5712 to 720 x 960.
Here are a few examples from the dataset:
If you want to build your own small dataset, make sure to:
- Ensure balanced feature representation: In our case, the cup appears in the training images from different angles. For a fair evaluation, the test set should also include images with more challenging viewpoints. This helps to check if the model generalizes instead of memorizing easy examples.
- Keep it simple: With only around 20 images, even detecting a single cup is challenging for a model. Start with an object that is visually distinct and easy to recognize, and ideally begin with just one object class.
- Keep your goal in mind: The model learns from what it gets. You want to supply the model with pictures, which are conceptually equivalent to the pictures used during inference. For example, if you expect the model to detect objects in front of a specific background or within certain rotations, ensure that the training data reflects these conditions. The more variation you introduce, the more complexity you require in the model architecture.
If you want to follow the tutorial step by step, including the annotations and all the settings, you can download the dataset below. If you prefer to skip the setup steps, you can download the completed project and immediately start the training.
Preparing the dataset
If you want to apply the settings of the project yourself, you first need to create a new OneAI Project. Click on AI > OneAI Project Generator, enter a name and select the Default template. This automatically opens a .oneai file with the default settings.
To import the unlabeled pictures, you can either click on the Import button and then on the Import folders button. Or you can just drag and drop the corresponding folders into OneWare Studio. Make sure to uncheck Use Validation Split for the validation data and set Validation Image Percentage at the test section to 0% since we split the data manually.
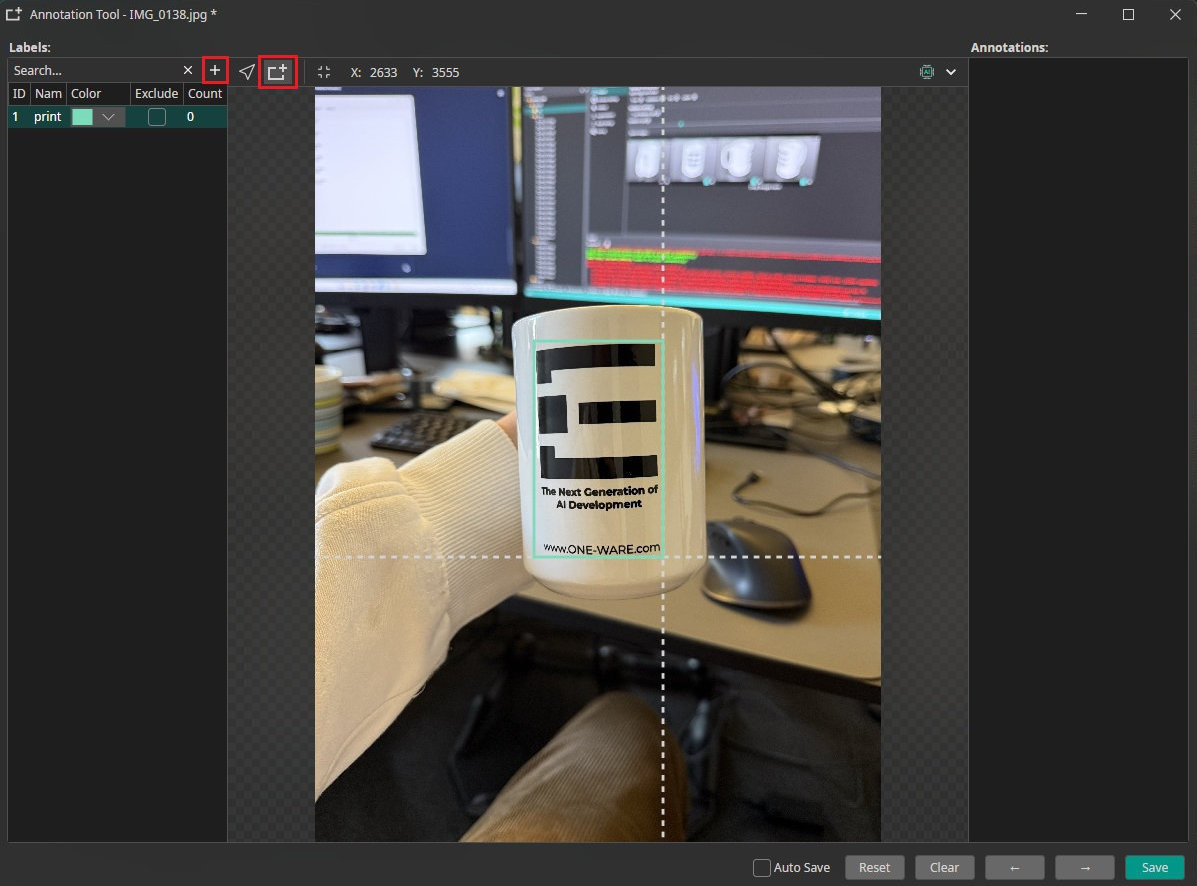
Now we have to annotate the data. To do this, click on the icon in the bottom right corner of a picture to open the annotation tool. To add a new label, click on the + symbol and enter a name for the label. In this case we only need one label, which we call "print". Now you can select the print with the rectangle tool on the top, save this picture as labeled, and continue with the next one.
Filters and Augmentations
Since the dataset is very small, we aim to both reduce the image information to its most essential features through prefiltering and to increase variation through augmentation to enrich the training data.
To keep it short, we just point out the values we used for the following settings with a brief explanation of why we chose these values. For further details about the augmentations or prefilters, please refer to the documantation or previous tutorials.
Prefilters
As you can see in the Resize filter, the images are relatively large for the requirements of this task, even after being scaled down to 720 x 960. Since the high resolution is not necessary here, keeping the initial size would make the task more complex for the model, because it would need to analyze a large area to detect the print. To address this, we set the Resolution in the Resize filter to 25% of the original.
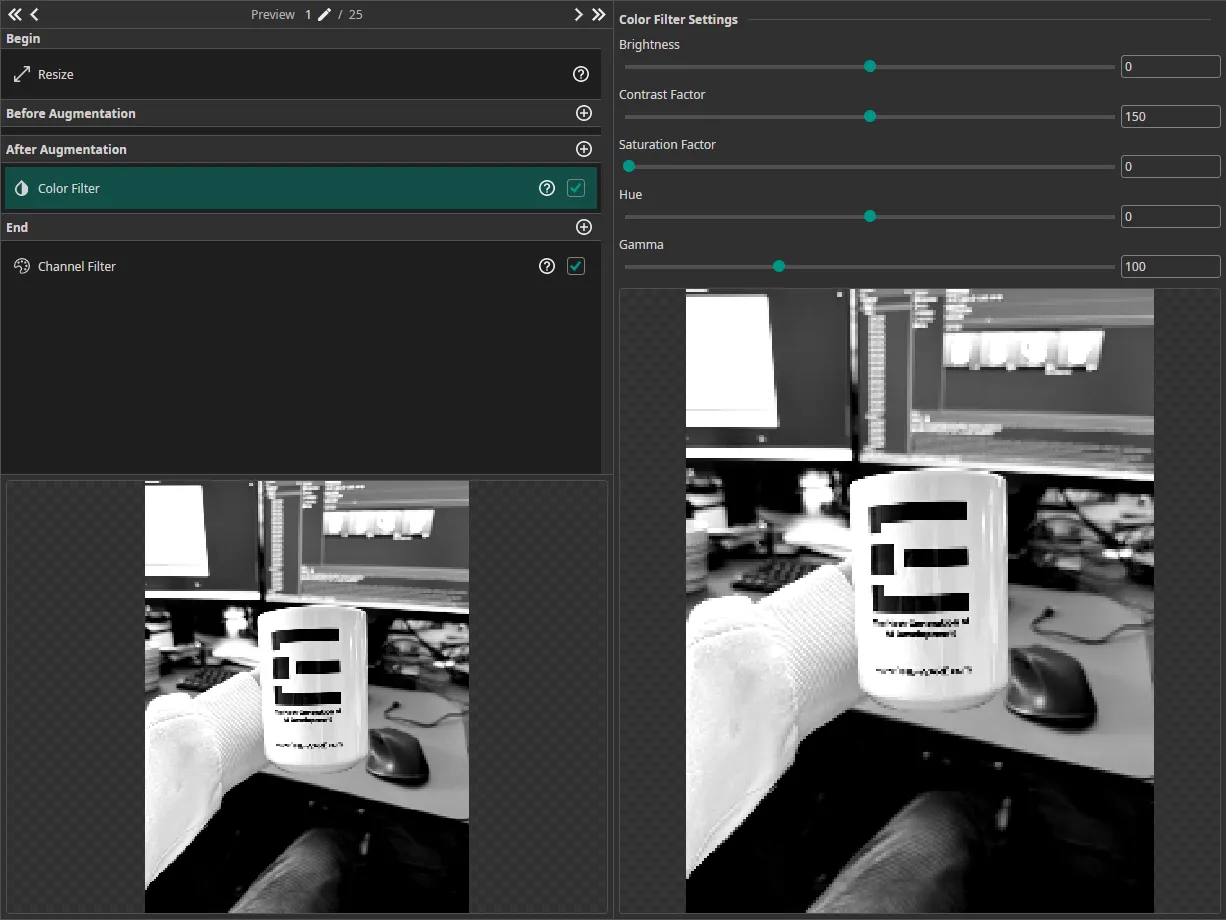
Next, we add a Color Filter in the After Augmentation section. This placement is important, because we will apply a Color Augmentation. The goal of the Color Filter is to enhance the contrast and make the logo stand out more clearly, so we set the Contrast to 150. Since color is not important for this task, we remove it by setting the Saturation to 0. To avoid unnecessary processing of color channels, which is now irrelevant because the image is grayscale, we disable the green (G) and blue (B) channels in the Channel Filter.
Augmentations
Our dataset is very small, so we want to apply a wide variety of augmentations to extend the dataset. We use the following augmentations:
- Move Augmentation: We shift the picture by ±20% in both directions. Ensure that the print does not move out of the white preview box to get the best results.
- Rotate Augmentations: Our goal is to detect the print in almost every kind of appearance, including rotations, so we let the image rotate from -180 to 180°.
- Resize Augmentation: Here we choose a value of ±20% to have examples at different scales.
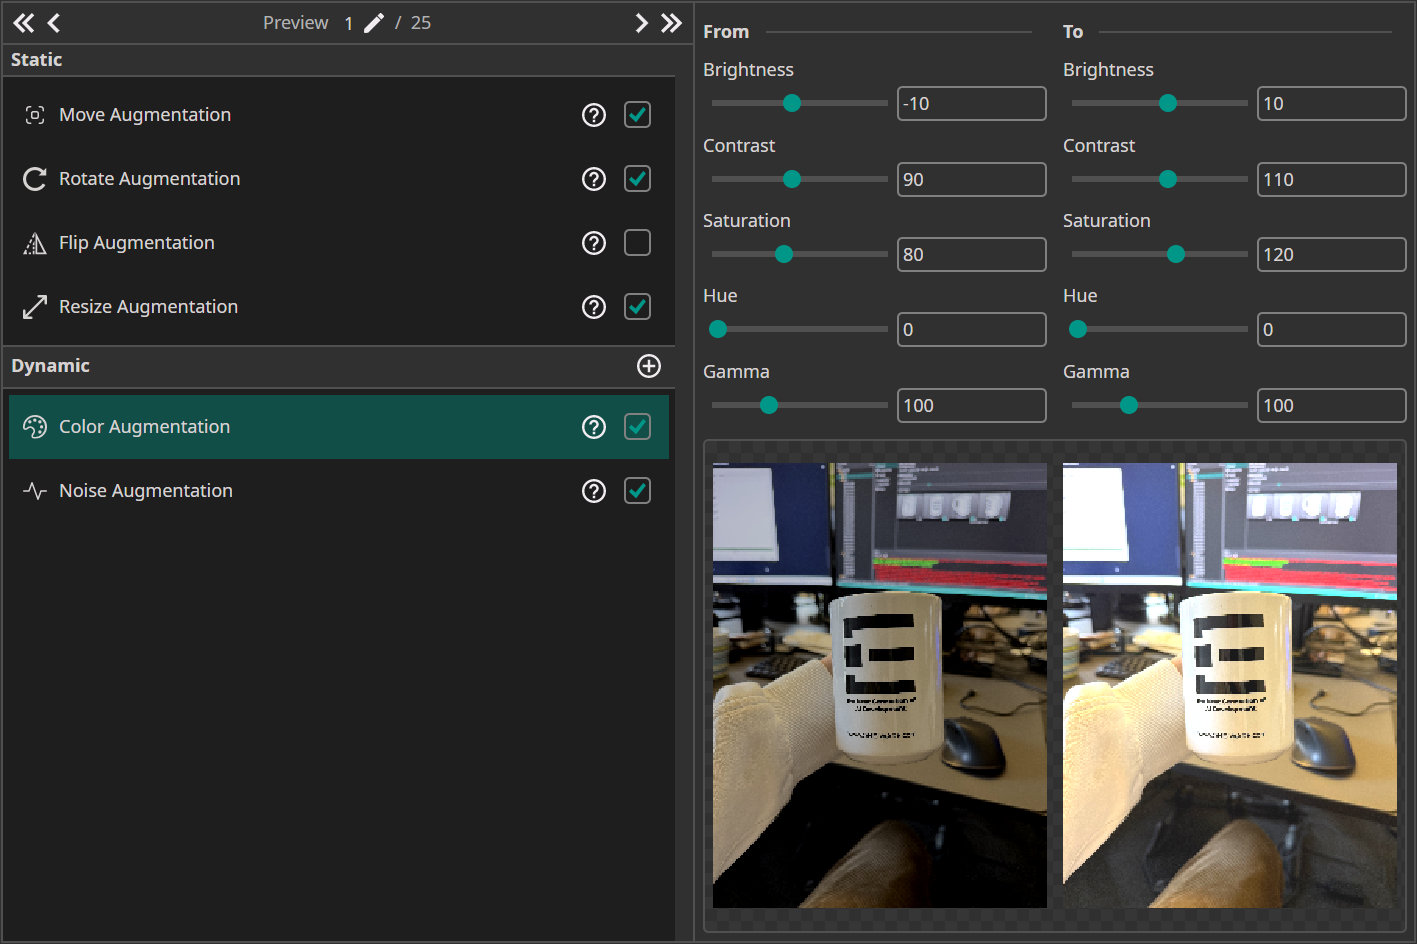
- Color Augmentation: We set the Brightness and Contrast to ±10 and the Saturation to ±20 to mimic changes in the lighting conditions.
- Noise Augmentation: This augmentation makes the model robust against noise from the camera. We set the maximum value to 5%.
In general, when applying augmentation, keep in mind that it should always fit the corresponding task. It doesn't make sense to flip the image in any way if the cup cannot realistically appear in that orientation in the real world.
Model settings
The first thing that we need to configure in the Model Settings is the Surrounding Size, which describes the area that the model needs to analyze to make its predictions. We can specify this area relative to the image or relative to the objects. For this demo, it's simpler to specify the surrounding size based on the object size. As we can identify the prints by just looking at the prints themselves, we don't need to analyze the area surrounding them. Therefore, we leave the Estimated Surrounding Min Size and the Estimated Surrounding Max Size at 100%.
The Same Class Difference is set to 20%, since the print is always the same but shown from different angles.
The Background Difference is set to 75%, because we have very different backgrounds in the pictures. However, some pictures share the same background and just show a different rotation of the cup and print.
For Detect Complexity we choose 25%, because the task is relatively simple.
Training the model
After all the configurations, we finally come to the most interesting part of this tutorial: training the model. To connect to the server, click the Sync button and create a new model by clicking on the +. Click on the Train button in the top-right corner to open the training configurations, where we change the training duration to 15 minutes. We set the early-stopping patience to 50%. This means that if the model does not improve for half of the total training time, the training process will stop. This setting helps to reduce the risk of overfitting and avoid unnecessary training.
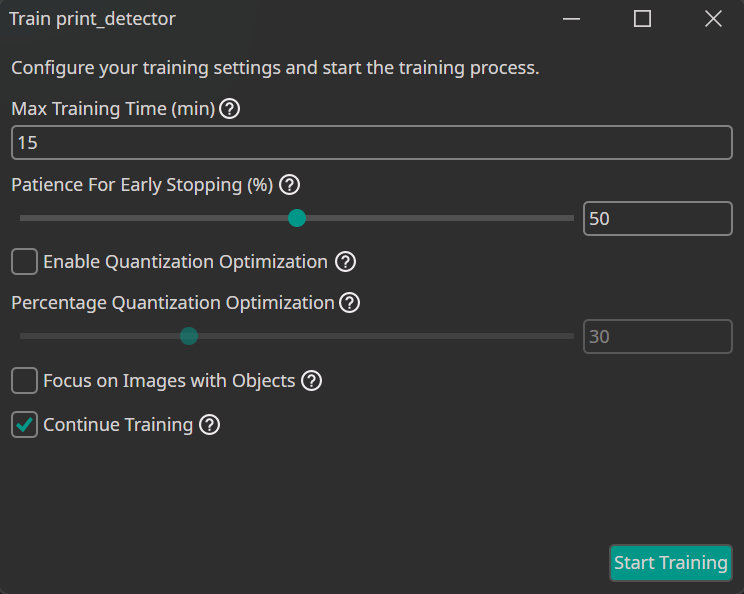
Finally we can start the training by clicking Start Training.
In the Logs section we can see some specifications about the model selection, for example, the number of the parameters. In the Statistics section, we can follow the training, where the F1 score, as well as the training loss and validation loss, are plotted.
Testing the model
Once training is complete, you can test the model by clicking Test. This opens the test configuration, where you can set additional parameters:
- Visualize amount: The amount of test images to visualize.
- IoU threshold (Intersection over Union): The minimum overlap required between predicted and true labels for a detection to be considered correct.
- Show metrics: Enable this to display key performance values, including F1 score, precision, and recall.
- Visualize problematic: Only visualize images where the model struggled. This option is useful for quickly identifying and analyzing challenging cases.
- Generate Heatmap: Produces a heatmap highlighting the areas the model focuses on. Currently, this is only supported for classification tasks.
- Check last vs best model: During the training two model checkpoints are saved, the best performing model and the final model. Activating this option allows you to compare the performance of these two models and select the one with the best real-world performance.
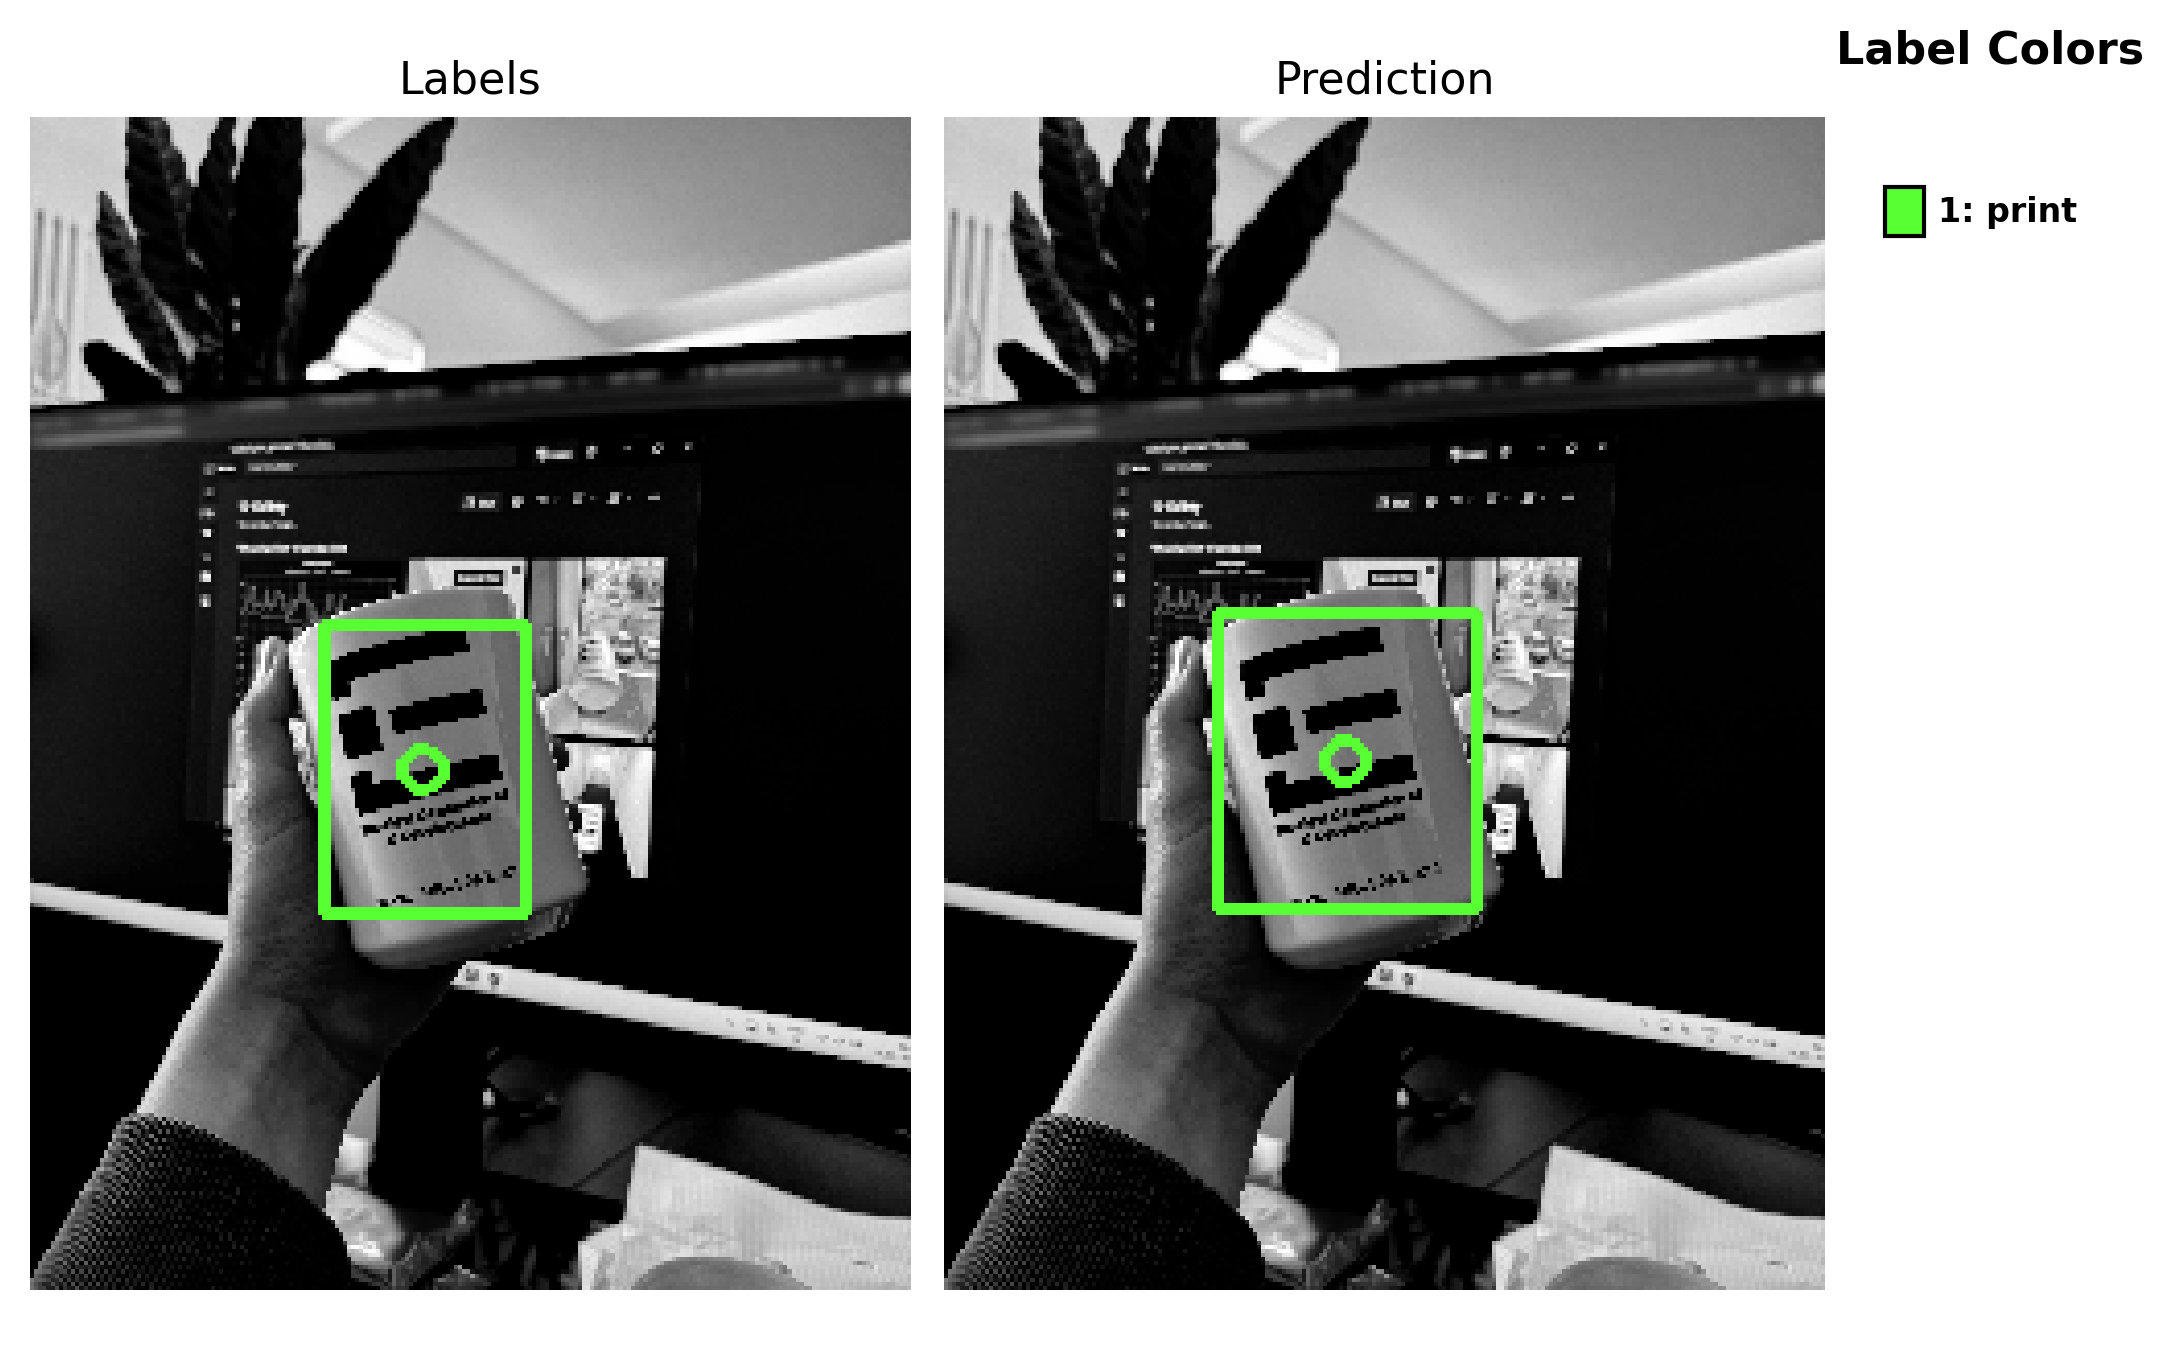
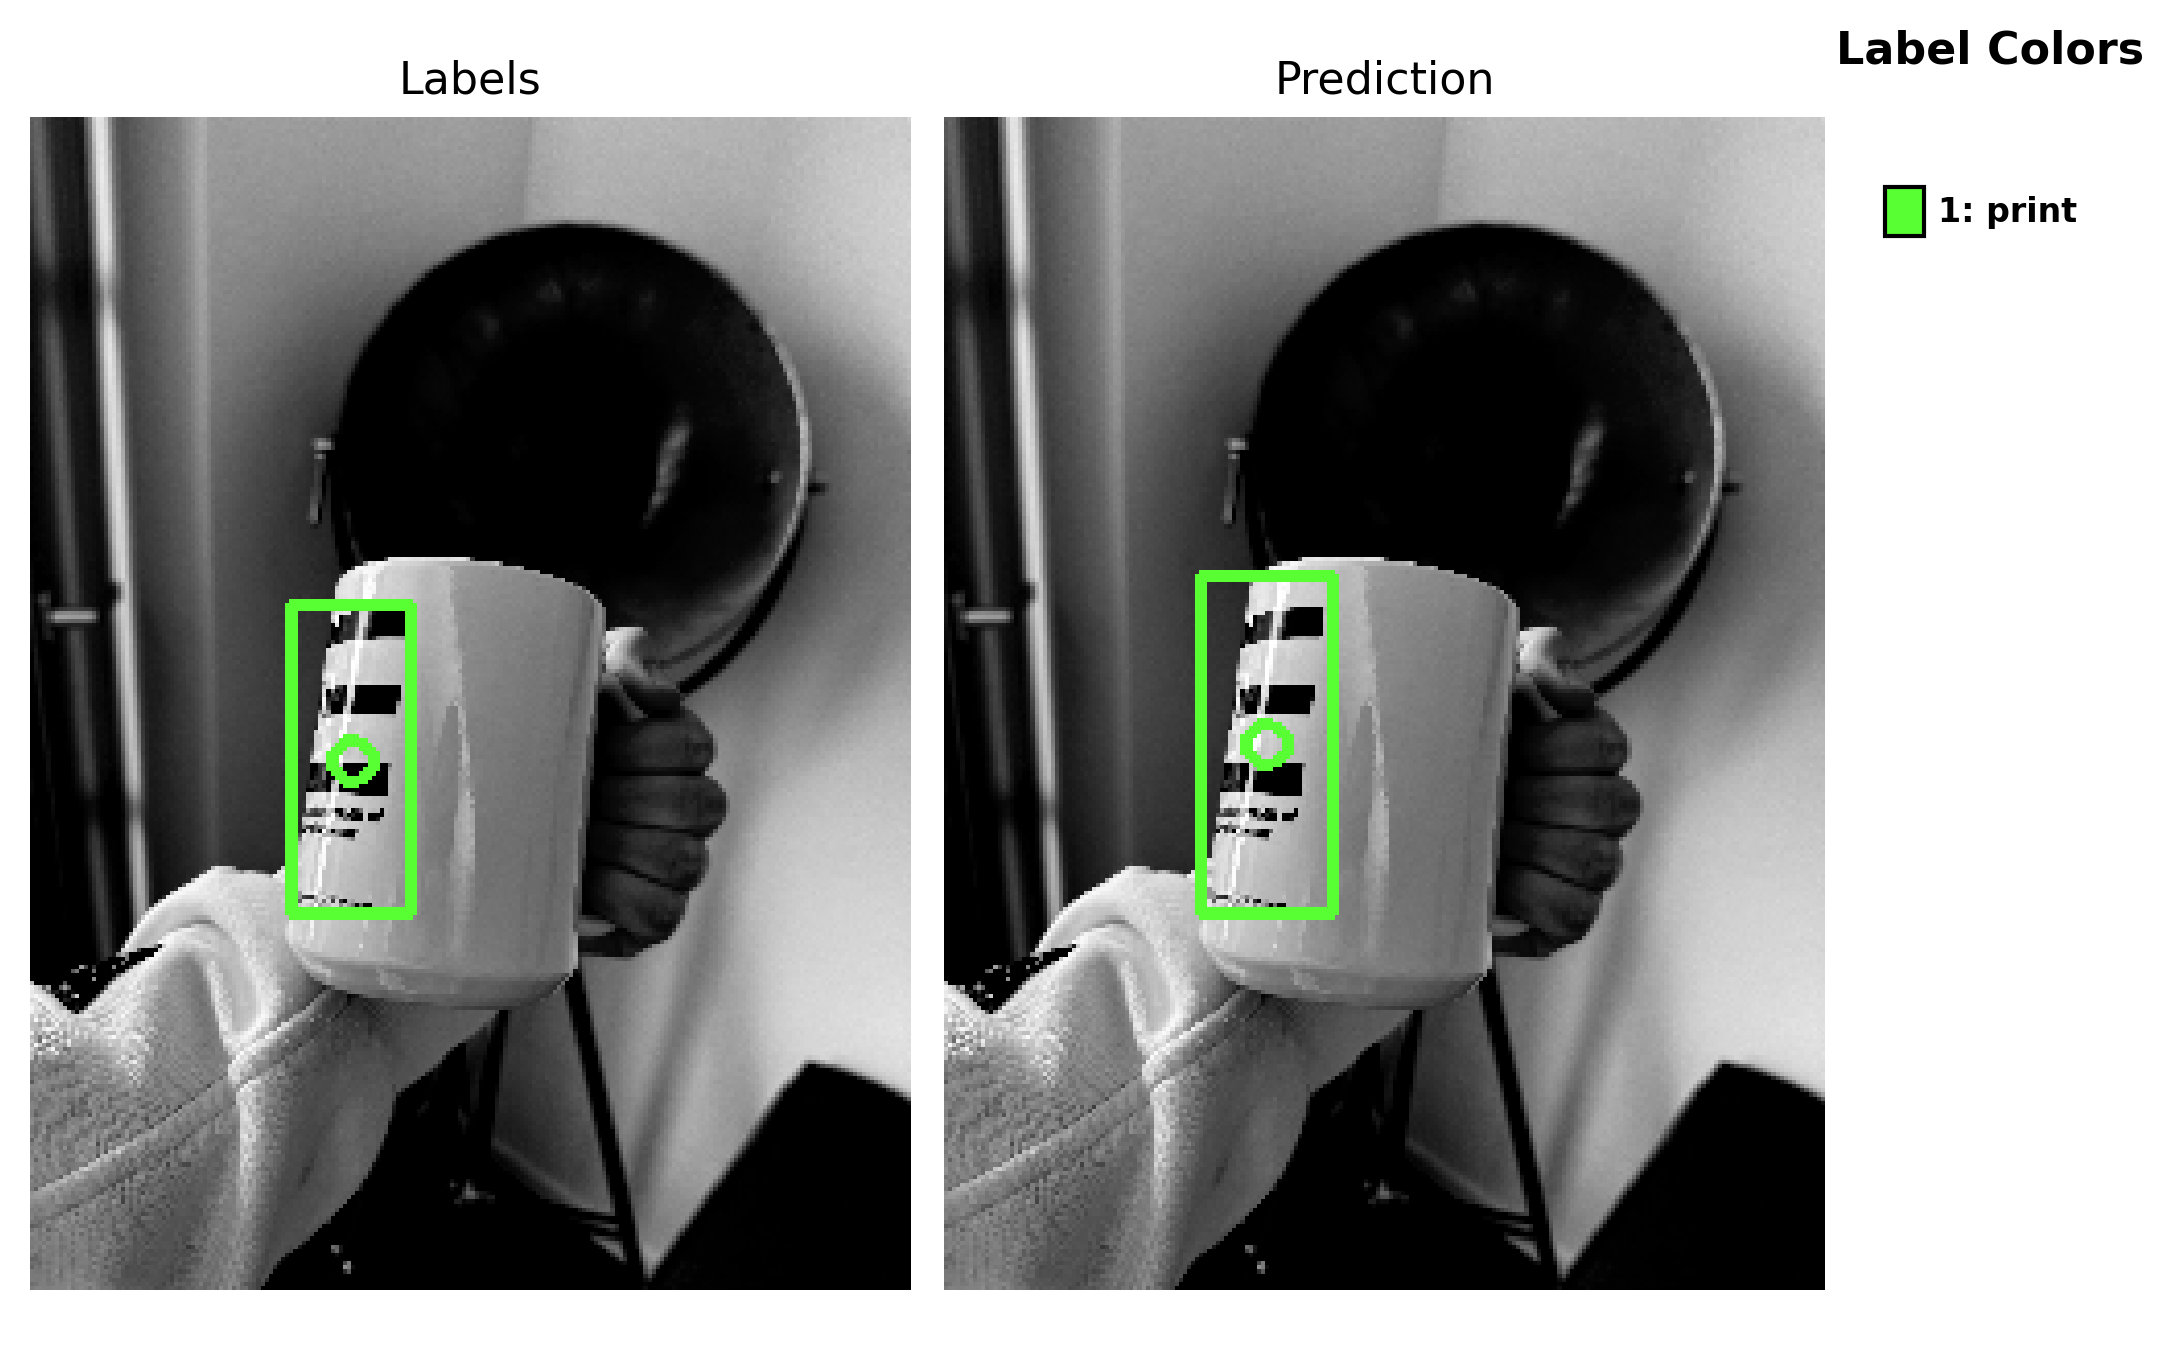
By clicking Start Testing, you can start the test process, which will take a moment and then output the results in the Logs section. In the OneWare Cloud, you can see how the model performs on the test pictures. To get there, simply click on View Online button. This opens the browser, where you can log in to your OneWare Cloud account and view the test set results. As we can see, our model performs very well and correctly detects the logo. When an annotation is correct, the label is highlighted in green.
Model export
🔗 model export guide
To make the model available for different tasks, you can export and download it. Click on Export to open the export configuration menu.
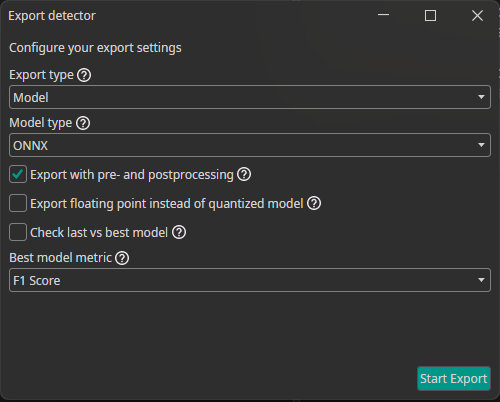
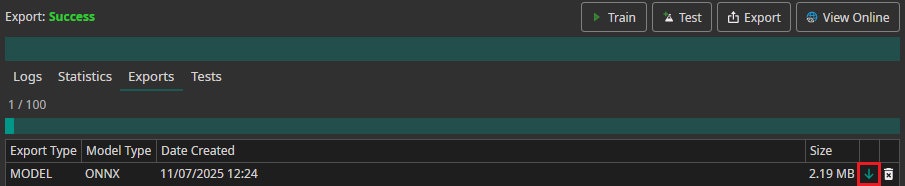
Then, click Start Export to begin the process. Once the server has completed the export, you can download the model by clicking the downward arrow in the Exports section.
Once downloaded, the model can be used to annotate additional images or tested directly using the Camera Tool. To do this, open the Annotation Tool on an image — whether it has already been annotated or not. To use model-based annotation, first click the dropdown arrow shown in the image below. This will allow you to select from all downloaded models for this project. Choose the desired model and click the + button to add it. You can also adjust the model's confidence setting, which controls how confident the model must be in its predictions before annotating an object.
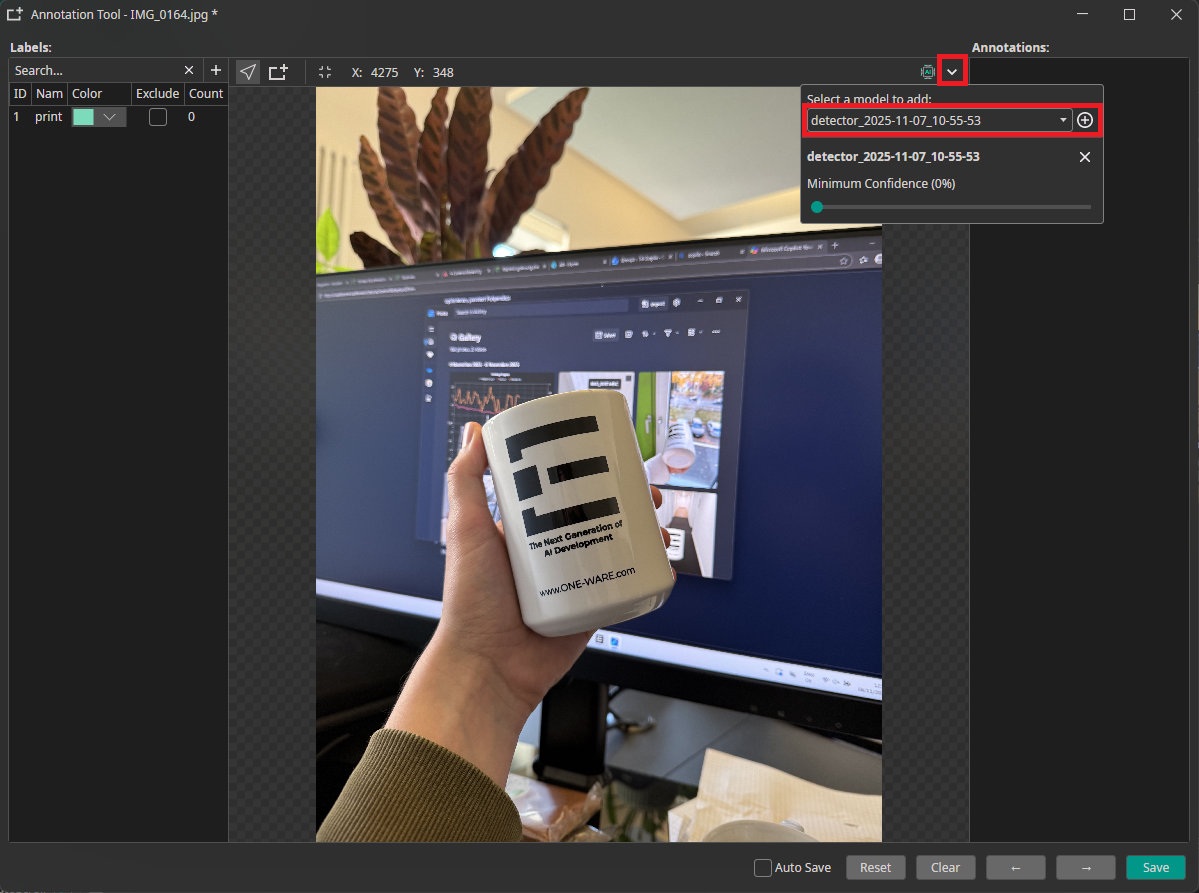
Once the model is added, you can automatically label images and evaluate its performance by clicking the AI button next to the dropdown menu. The model will automatically annotate any labels it detects in the image.
Need Help? We're Here for You!
Christopher from our development team is ready to help with any questions about ONE AI usage, troubleshooting, or optimization. Don't hesitate to reach out!