VHDL Project Demo
About this demo
This demo showcases how to run a OneAI model on an FPGA for a demo use case. The use case will be the classification of handwritten digets. You can identify your own handwritten digits using an FPGA board of your choosing and the webcam of your computer. Requirement to run this demo is an FPGA board of your choosing and a computer with access to a webcam. Since communication between the FPGA board and the computer will be conducted via UART, please make sure you have the necessary cables and/or adapters.
As this tutorial is not for any specific FPGA chip or board, board or chip specific sections may be quite vague. Thus, this tutorial assumes a certain familiarity of the user with FPGA development and the board or chip the user wants to run this tutoria on.
Please follow the Handwritten Digit Classification Demo to obtain a CNN model. There are two necessary deviations pointed out in the next section. Stop the Handwritten Digit Classification Demo before exporting the model and then follow this tutorial here from the section Model export onwards.
Deviations to Handwritten Digit Classification Demo
Hardware settings
Instead of the Altera™ Max® 10 16K use the correct settings for the FPGA you are using. In order to simplify parametrization feel free to use the Extension Manager, which offers pre-configurations for various FPGA families. Click on Extras > Extensions to open the Extension Manager, then go to the section Hardware > OneAI Support. Here, install the extension that includes your FPGA. If there is none, please follow the Specifying custom hardware guide.
Training the model
As we want to export for an FPGA the option Enable Quantization Optimization has to be turned on. We recommend a Percentage of 30%, which achieves a good trade off between training time and model performance. For the best performing model, the best Percentage is 100%, be aware that this will increase the necessary training time.
Model export
🔗 model export guide
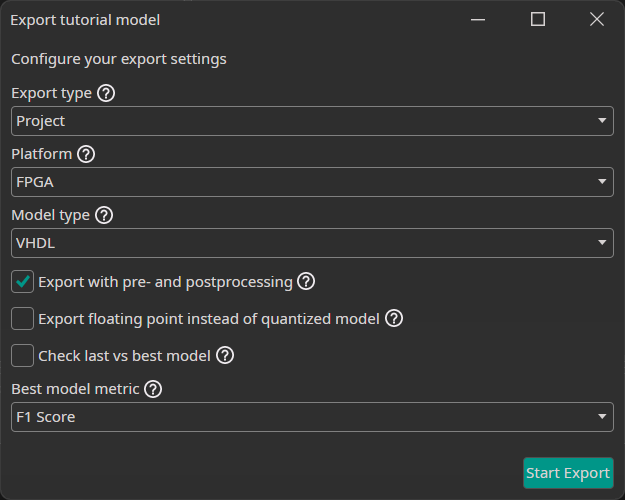
After the training is completed, we need to export our model. To do so, we click on the Export button, which opens a new window with configurations. In the Export type drop-down menu, we select Project and then under Platform choose FPGA. The Model Type is then automatically changed to VHDL, exactly what we want.
Next we can activate different settings, that change how our model is exported. If we check the Export with pre- and postprocessing checkbox, ONE AI will build all of our filters directly into the model. We activate this setting, because the filter pipeline is an important part of our model. The next setting allows us to change between exporting a floating point or quantized model. As we want a quantized model, we leave this unchecked.
The last check box allows us to select whether we want to export the last or the best model. This setting is only relevant for object detection tasks, so we can deactivate it.
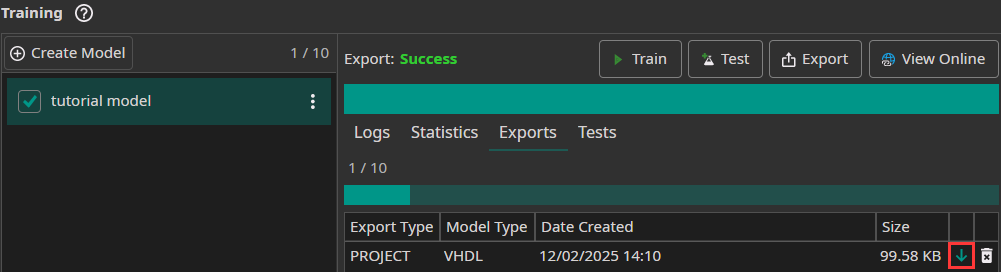
After the export is finished, we can download the exported VHDL model by clicking on the green arrow. This will save the model in the folder [ai_generator_name]/Export.
Simulation
This section describes how to simulate the One Ware VHDL model. While this step is not necessary per se, it is included nontheless for the sake of completeness.
The downloaded folder contains a ONEAI_Simulation.vhd-file. This file implements a test bench ready for use. Use the included ONEAI_Simulation-entity as the top-level entity in the simulation tool of your choice.

Running the simulation will use test data provided by Test_Data_Package.vhd, also included in the download. The following images show wave forms of the input and output signals of the CNN.


Simulating only a few milliseconds is already enough to see the first CNN output.
Testing the CNN
Download Resources
Please download the following archive and extract the content. We are going to need the files included in the following two sections.
Compilation and Programming
Copy the CNN_FPGA_Demo-folder from the downloaded archive to a location of your convenience (e.g. C:/Users/one-ware-user/Projects/CNN_FPGA_Demo). Then add the export folder (export_files), which we obtained in the section Model export, with all its content into that folder. The content of the CNN_FPGA_Demo-folder should now look as follows:
- export_files (Folder)
- UART (Folder)
- cnn_fpga_demo.v (File)
Within the FPGA development environment of your choosing, create a new project and add all the files within the CNN_FPGA_Demo-folder to that project. Connect the necessary pins to the input and output signals of the cnn_fpga_demo design entity:
io96_3a_pb1_fpga_rst_nBoard/Chip resethvio_pllrefclkClock (e.g. 100MHz)io96_3a_pb0Reset buttonio96_3a_led0LED (for a 1.4Hz heartbeat)uart_rx_pinUART RXuart_tx_pinUART TX
Compile and download to the FPGA.
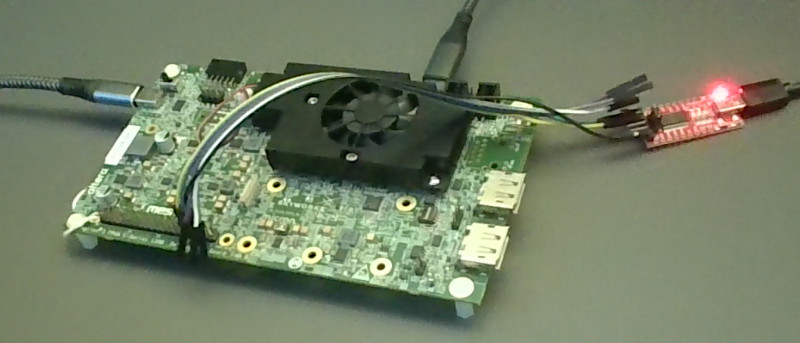
Connecting to the FPGA
In order to connect to the FPGA we need a working UART connection. Make sure you have a suitable adapter and connect the necessary cables to the computer and the FPGA.
In the archive downloaded above is a Python script. The following libraries are required, please make sure they are available on your system:
pyserialopencv-python
Launch the script with the following command:
python .\OneART.py --port COM3 --baud 3000000
You should adapt the command to reflect the actual serial port used on your computer and the baud rate used in the FPGA project (3,000,000 is the value provided in the download, but may not work for all connection types). The following launch options can be used with the provided script:
--port xyzSerial port of the connection--list-portsPrints all available serial ports--baud xBaud rate. Default 115,200.--timeout xTimeout interval in seconds for the serial connection. Default 3s.--camera xID of the camera to use. Default 0.

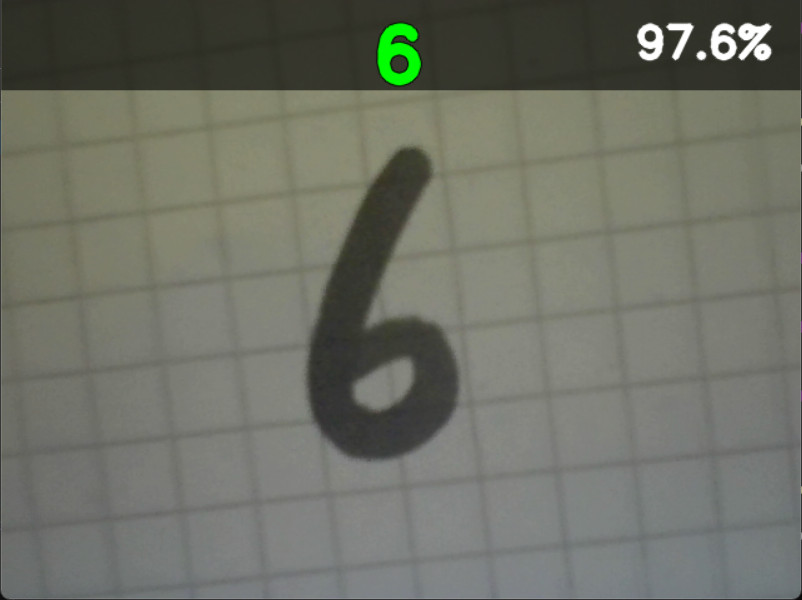
After launch, the script establishes a serial connection to the FPGA. Type ? to test the connection. IF everything works the FPGA will send the answer to the question about life, the universe and everything. Type c to start the webcam capture. This will then continuously send frames from the capture to the FPGA and print the classification result onto the depicted webcam feed. You now can hold written digits in front of the camera to verify the accuracy of the CNN.
The following is a complete list of available commands within the script environment:
qoreto exit.?To test the connection to the FPGA. IF everything works the script prints the reply from the FPGA, which is the answer to the question about life, the universe and everything.cTo start the webcam capture.sTo stop the webcam capture.- <any string> Any other string is interpreted as a file name of/path to an image and the script will try to send it to the FPGA for inference.
FAQ
The default Baud rate is too high for my connection. What can I do?
The default baud rate in the VHDL project is set to 3,000,000. While this is necessary for a visually pleasing camera stream, it may not be feasable for all serial connection types. To lower this value, in the VHDL project folder go to the file UART/UART_Image_Interface.vhd and adapt line 24 (it defines BAUD_RATE) to a lower value, e.g. 115,200, and recompile the project. When starting the python script make sure to start it with the new baud rate in the starting parameters. The script will adapt its frame rate automatically to the bandwidth of the serial connection.

Need Help? We're Here for You!
Christopher from our development team is ready to help with any questions about ONE AI usage, troubleshooting, or optimization. Don't hesitate to reach out!