Brain Tumor Segmentation Demo
To try this demo, click on the Try Demo button below. If you do not have an account yet, you will be prompted to sign up. After logging in, the quick start overview will open where you can select the Brain Tumor Segmentation project. Once installed, ONE WARE Studio will open automatically.
About this demo
In this demo, we will build our first segmentation model using OneAI. Unlike classification or object detection, segmentation assigns a class label to every individual pixel of an image. This makes it particularly well suited for medical imaging tasks, such as identifying tumor regions in MRI scans.
The goal of this tutorial is to demonstrate how a brain tumor segmentation model can be trained using only 50 MRI images. The focus is not on achieving state-of-the-art medical performance, but on showing how quickly and efficiently a segmentation workflow can be set up and trained with OneAI.
By using the Medical template, we already benefit from meaningful default prefilter and augmentation settings that are well suited for medical imaging data.
Dataset overview
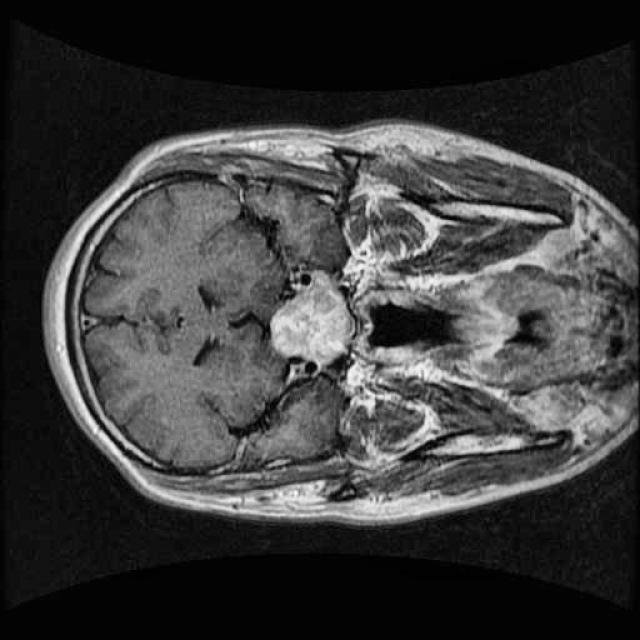
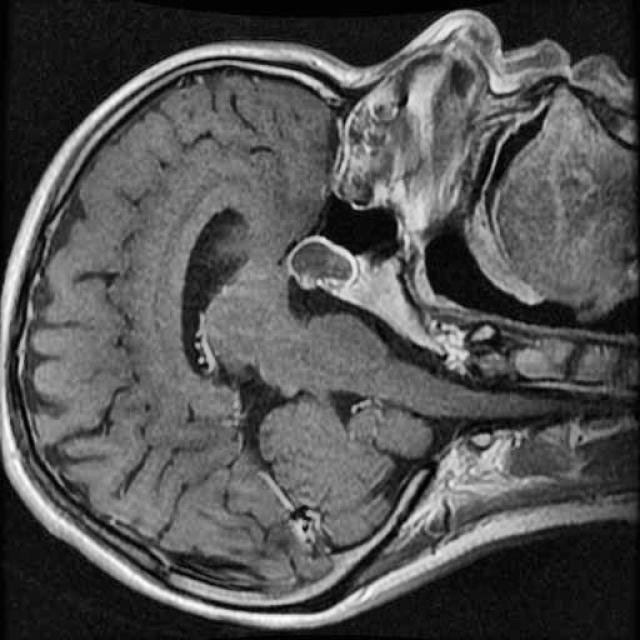
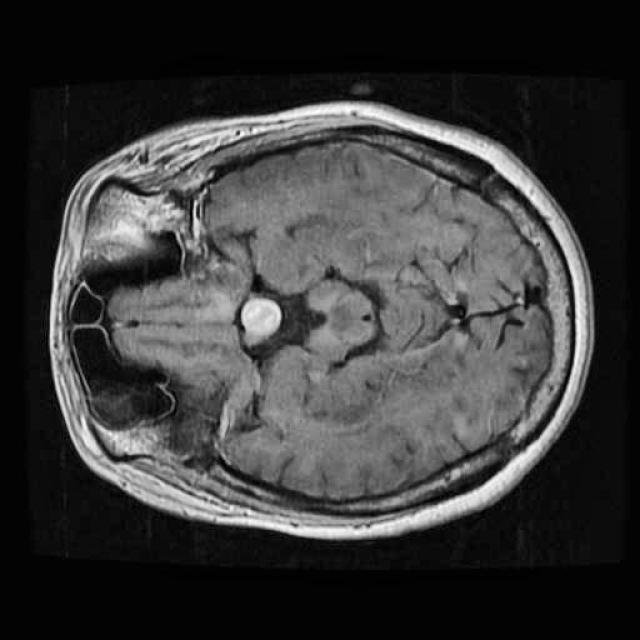
For this tutorial, we use a small dataset consisting of 50 MRI images of the human brain.
These images were selected from a larger Roboflow dataset containing many more samples annotated in an object detection format. You can find the original dataset here.
Even with a relatively small dataset, segmentation combined with targeted augmentations can extract useful spatial information and allow us to train a functional model.
Preparing the dataset
To get started, create a new AI Generator by clicking AI > Open AI Generator.
Enter a name for your project and select the Medical template. This template provides a set of default configurations suitable for medical data such as MRI scans.
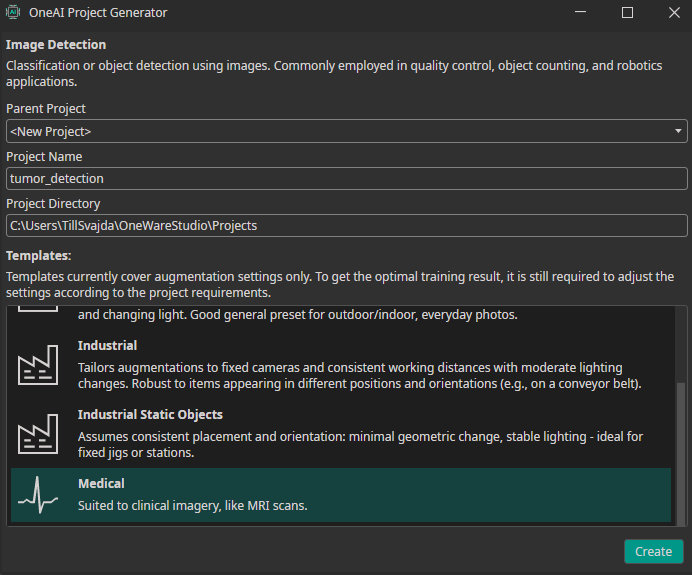
Click Create to generate the .oneai configuration file. This file contains all relevant settings, including dataset import, prefilters, augmentations, hardware configuration, model settings, and training parameters.
Since the dataset is not annotated in a segmentation format, it cannot be imported as a standard labeled dataset. For this tutorial, the dataset is already provided in the OneWare format.
To load it, simply replace the existing dataset folder in the project directory with the provided dataset. This can be done directly in OneWare Studio via drag and drop.
Make sure to switch the mode in the top-right corner from Detection to Segmentation, and add a label in the labels section. After doing this, the segmentation masks should appear when opening an image.

If you want to annotate the images yourself, you can import the MRI images using Import Dataset or by dragging and dropping them into OneWare Studio. Because the images are initially unlabeled, they will be imported as an unlabeled dataset.
For annotation you can use the following tools:
- Colored Pencil - used to directly mark tumor regions on the MRI images
- Eraser - used to remove incorrect or imprecise annotations
- Brush Size Control - adjust the brush size depending on tumor size and image resolution
- Opacity Control - modify the opacity of the segmentation mask for better visibility
Carefully label the tumor regions on all 50 images. At this stage, annotation quality is more important than speed, as the overall segmentation performance strongly depends on precise masks.
In a real medical scenario, this task should ideally be performed by a domain expert to ensure annotation accuracy.
Filters and Augmentations
By selecting the Medical template, most prefilter and augmentation settings are already well suited for this task.
One useful adjustment is the channel filter in the prefilter section. Since MRI images are grayscale, we can remove the unnecessary color channels (G and B). This reduces memory usage and keeps the processing pipeline efficient without losing relevant information.
Additional prefilters are generally not recommended, as they may remove subtle but important image details.
The preset augmentations already fit this use case well, so we keep them unchanged. These augmentations simulate small variations in patient positioning and scanner setup while preserving the anatomical structure of the brain.
Model settings
In medical applications, missing a tumor region is usually more critical than falsely detecting one. Therefore, we bias the model towards higher recall by setting the precision-recall prioritization to 75.
We apply the following model settings:
- Maximum Memory Usage: 90 (sufficient for testing the model later on CPU)
- Estimated Surrounding (Min): 10 / 10
- Estimated Surrounding (Max): 30 / 30 These values correspond to the approximate size of the smallest and largest tumors in the dataset.
- Same Class Difference: 25 Tumor appearances vary slightly but remain relatively consistent.
- Background Difference: 25 MRI scans were taken from different angles, resulting in moderate background variation.
- Detection Simplicity: 75 Overall, this is a relatively simple segmentation task.
These settings help the model focus on local tumor structures while maintaining sufficient separation from the background.
Training the model
Once labeling, filtering, augmentation, and model configuration are complete, we can start training.
Click Sync, create a new model using the + button, and open the training configuration by clicking Train.
For this tutorial, we set the training time to 15 minutes. This is sufficient to demonstrate the segmentation workflow and produce meaningful results even with a limited dataset.
During training, you can monitor progress in the Logs and Statistics sections.
Testing the model
After training is finished, click Test to evaluate the segmentation model.
The testing view allows you to visually inspect:
- The predicted segmentation masks
- Differences between ground truth annotations and model output
This qualitative evaluation is especially important for segmentation tasks, where spatial accuracy and mask quality often matter more than a single numerical metric.
Need Help? We're Here for You!
Christopher from our development team is ready to help with any questions about ONE AI usage, troubleshooting, or optimization. Don't hesitate to reach out!