Raspberry Pi Person Warning Sign (2000+ FPS)
To try this demo, click on the Try Demo button below. If you don’t have an account yet, you will be prompted to sign up. After logging in, the quick start overview will open where you can select the Raspberry Pi Warning Sign project. Once installed, ONE WARE Studio will open automatically.
About this demo
This demo showcases a practical edge AI application: a warning sign that glows when a person approaches a recording studio door.
The hardware setup:
- Raspberry Pi 5
- Standard USB webcam
- 3D printed warning sign
- LED strips
- Dual MOSFET Driver Module (DC 5V–36V, 400W FET Trigger Switch Board) for LED control
Initially, we used a tiny YOLOX person detection model: https://github.com/Megvii-BaseDetection/YOLOX/tree/main
While accurate, it achieved only 4–5 FPS on the Raspberry Pi. With that latency, the warning triggered after the door was already opened.
Instead of optimizing a general-purpose detector, we built a task-specific binary classification model using ONE AI.
The result:
Over 2000 FPS on a Raspberry Pi 5.
Results
The custom ONE AI model dramatically outperformed YOLOX in this specific use case.
| Metric | YOLOX Nano | ONE AI Custom Model |
|---|---|---|
| Task Type | Object Detection | Binary Classification |
| FPS (Raspberry Pi 5) | 4–5 FPS | 2000+ FPS |
| Decision Latency | Too slow | Instant |
| Model Size | 910k Param. | 34k Param. |
This demonstrates how powerful task-specific model generation can be on edge devices.
The Solution with ONE AI
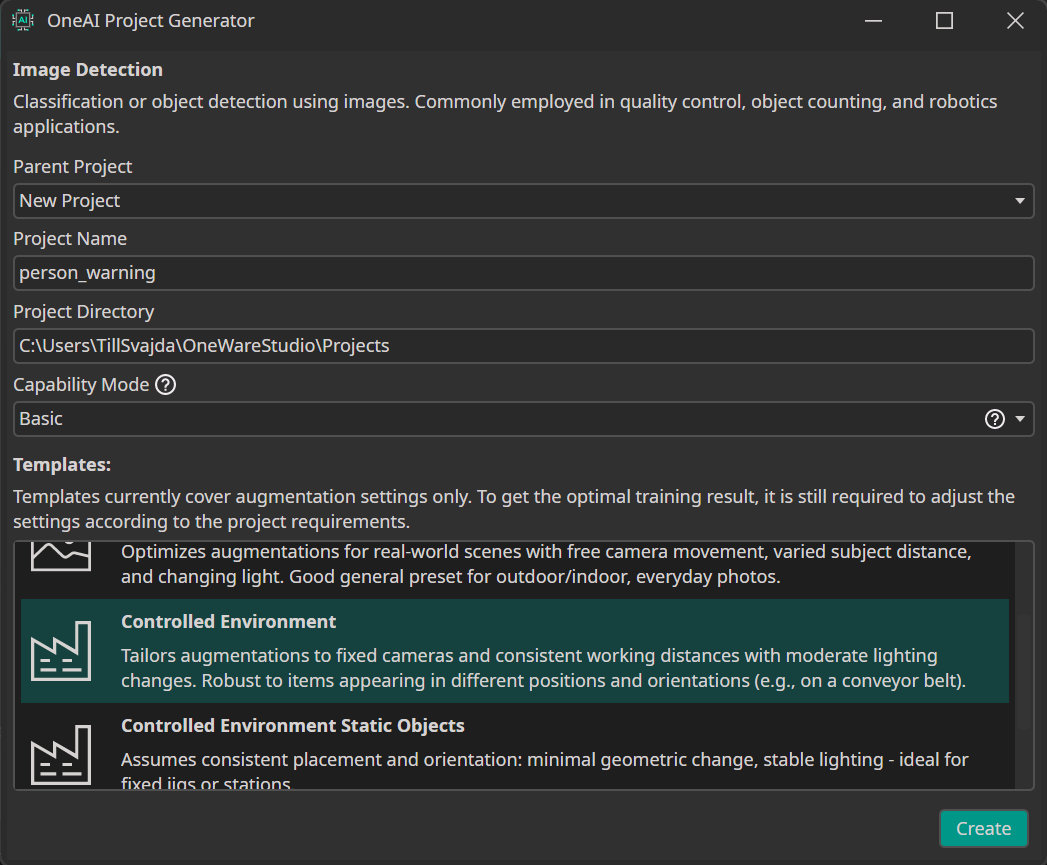
We started a new ONE AI project by clicking on ONE AI Project Generator under the AI tab. Then we selected the Controlled Environment preset.
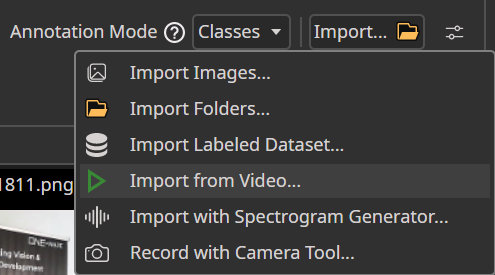
Next we recorded a 2-minute video of a person attempting to open the door.
Using the Video Import Tool in ONE WARE Studio:
- The video was automatically split into frames.
- Frames were classified into:
- Person present
- No person present
With this dataset, ONE AI generated a compact CNN architecture tailored specifically for this binary decision task.
Because the background and camera position remain constant, the model can focus purely on detecting behavioral changes in the scene.
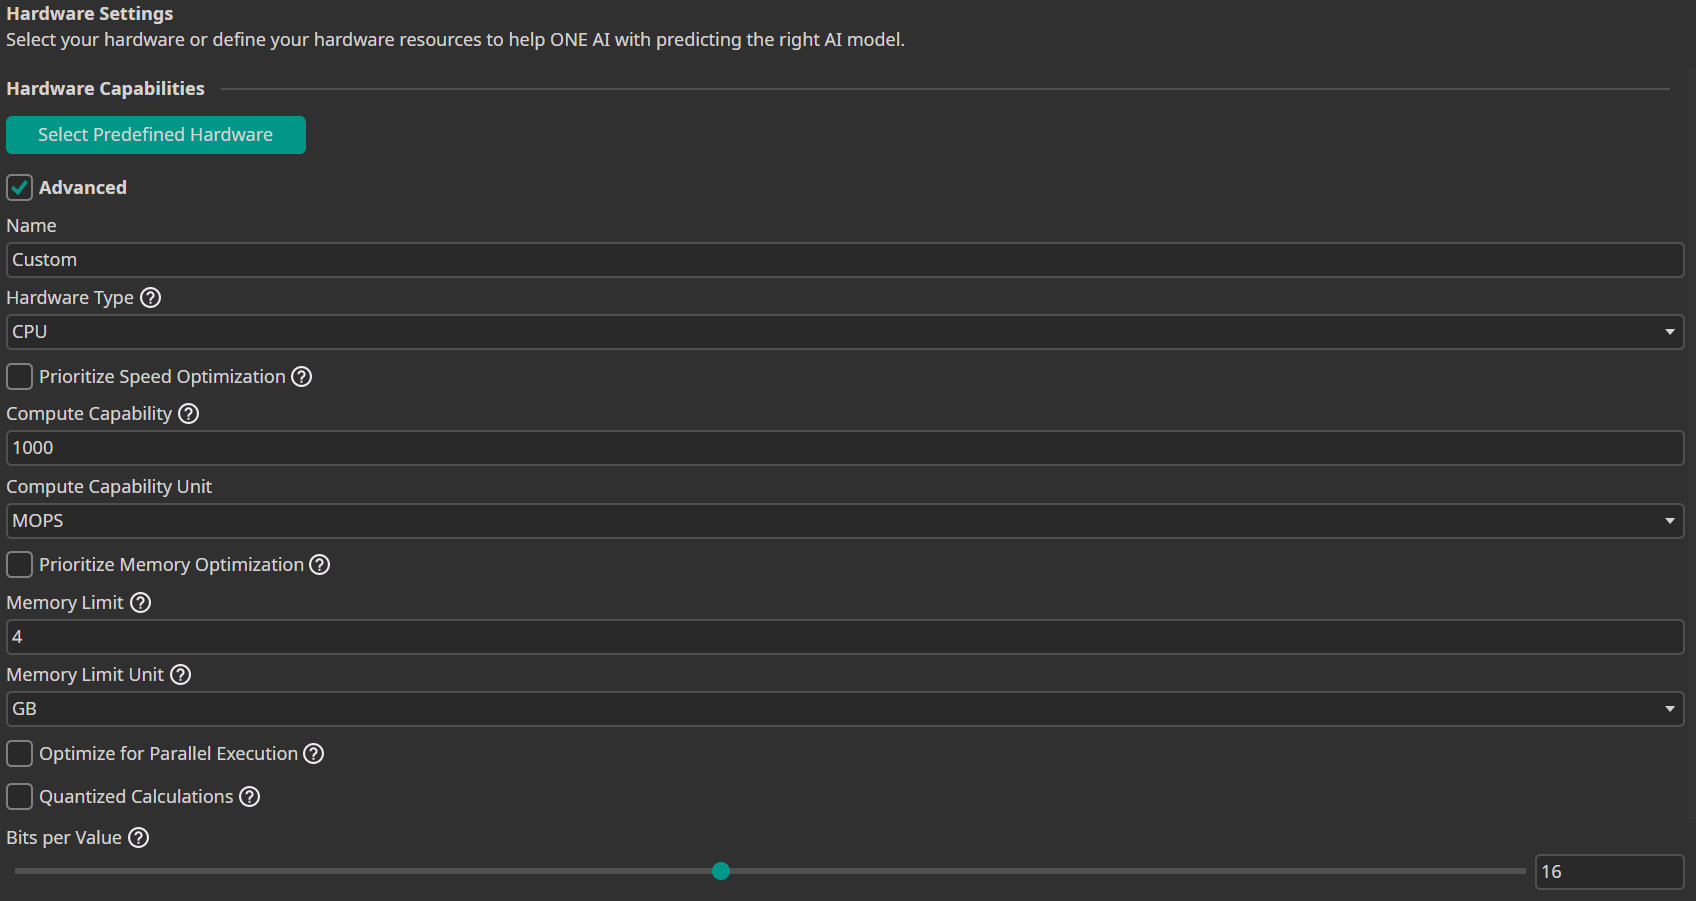
Hardware Settings
We enabled Advanced Settings and configured:
- Compute Capability: 1000
This forces ONE AI to generate a very small and efficient architecture suitable for edge deployment.
Data Processing
To maximize speed:
- Input Resolution: 13%
- Color Filter: Saturation = 0 (grayscale)
- Channel Filter: Removed G and B channels
This dramatically reduces computation while preserving the essential visual information for this task.
Data Augmentation
To increase robustness:
- Move Augmentation: ±10
- Rotate Augmentation: ±10°
- Resize Augmentation: ±20%
- Brightness: ±35
- Contrast Factor: ±20
These augmentations ensure the model remains stable despite small lighting changes or slight camera shifts.
Model Settings
- Minimum FPS: 250
- All other parameters left at default.
By defining a minimum FPS target, ONE AI prioritizes efficient model generation.
Training
- Click Sync to connect to the cloud.
- Add a new model.
- Click Train.
- Choose a duration of 5 minutes.
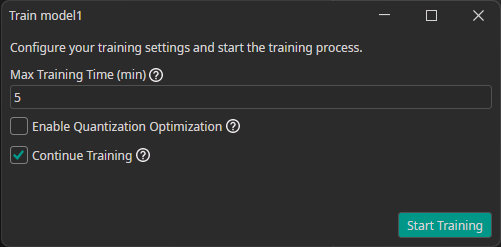
Due to the simplicity of the task and consistent environment, the model converges quickly.
Exporting and Deployment
After training:
- Click Export.
- Select TensorFlow Lite.
- Download the model from the export folder.
- Copy the
.tflitefile into the Raspberry Pi working directory.
Use the provided Python script (linked above) to:
- Run inference via webcam
- Control the MOSFET driver module
- Switch the LED strips on/off in real time

Need Help? We're Here for You!
Christopher from our development team is ready to help with any questions about ONE AI usage, troubleshooting, or optimization. Don't hesitate to reach out!