Create Vision Projects with ONE WARE Agents
Build a complete, production-ready computer vision application in minutes using natural language. With ONE WARE Agents, you don't need to manually configure neural architectures, draw hundreds of bounding boxes, or write boilerplate automation code. You describe what you need, and the agent carries out each step directly inside ONE WARE Studio.
Try ONE WARE Agents for Free
Want to test ONE WARE Agents on your own Vision AI project? Contact us to unlock a free trial with Compute Credits for your account.
In this tutorial, you will create a Pizza Quality Control model from a sample video:
- Create the project (the agent guides you through setup)
- Import raw video footage as a dataset
- Auto-label pizzas and toppings using Segment Anything (SAM)
- Configure target hardware
- Optimize prefilters and data augmentations
- Train a tailored model in the cloud
- Export to ONNX and test live in the Camera Tool
- Build a custom quality-control script and UI dashboard
Prerequisites
Before starting, make sure you have:
- ONE WARE Studio with the ONE AI and GitHub Copilot extensions installed. If you haven't set them up yet, see the Setup Guide.
- A ONE WARE Cloud account with Compute Credits. ONE WARE Agents and cloud training consume compute credits. (Alternatively, you can use a Self-Hosted ONE AI Worker).
- The Sample Dataset Video used throughout this guide:
Step 1: Create the Project
You don't need to write a long prompt or know the exact settings in advance. Simply tell the agent what you want to build, and it will ask you any questions it needs (like which annotation mode fits best or what to name the project):
Create a new ONE AI project for pizza detection.
If any details are missing, the agent prompts you interactively. For this guide, select or confirm Object Detection so the model can locate and classify individual pizzas and toppings.
💡 Want to know more about available annotation modes? Explore the Annotation Modes guide and Project Generator.
Step 2: Import the Dataset
Instead of manually extracting frames, you can pass video files directly to the agent.
- Click the paperclip icon in the chat input to open the file selector.
- Select the downloaded
pizza_detection_dataset.mp4file to attach it to the conversation.
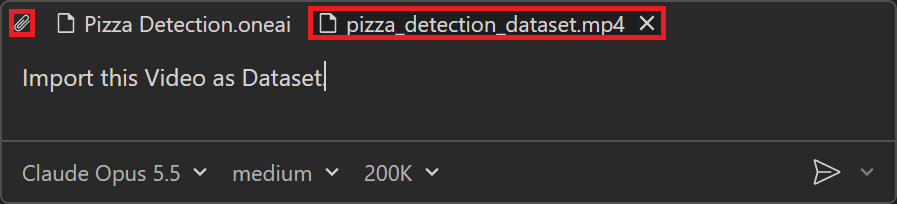
Then send this prompt:
Import this video as dataset.
The agent extracts key frames from the video, balances the dataset split between training and validation, and places them into your project.
💡 Learn more about supported formats and frame extraction in the Dataset Import guide.
Step 3: Auto-Label with Segment Anything (SAM)
Manually drawing bounding boxes across video frames is tedious and time-consuming. Because ONE AI integrates Segment Anything (SAM), the agent can detect and annotate objects automatically.
Ask the agent to create your labels and run SAM:
Create the labels "Pizza", "Salami", "Mushroom", "Olive" and "Bell Pepper".
Label the images with SAM.
The agent creates the label classes, runs segmentation across the dataset, and generates precise bounding boxes. If any objects are ambiguous, the agent will ask for clarification. You can open any image in the annotation tool at any time to inspect or fine-tune boxes.
💡 For details on labeling workflows and tools, see the Object Detection guide and Segment Anything (SAM) guide.
Step 4: Configure Hardware Target
ONE AI designs a custom neural architecture tailored specifically to the computational and memory limits of your target device.
Tell the agent where you plan to run the model:
Check the hardware settings. I want to run the model on my current PC.
The agent inspects your system's capabilities and configures the hardware profile so the generated model achieves the best balance between inference speed and accuracy.
💡 Deploying to embedded devices, microcontrollers, or FPGAs? See Hardware Settings.
Step 5: Configure Prefilters and Augmentations
Once your dataset is imported, the agent can optimize both image preprocessing and training augmentations together:
- Prefilters process images before they reach the model (resizing, cropping, color adjustment), reducing computational load and speeding up inference without losing critical detail.
- Augmentations introduce random variations (rotations, flips, scaling, lighting changes) during training so the model generalizes well to real kitchen and lighting conditions.
Ask the agent to configure both:
Check the prefilters and augmentations and configure the best settings for this dataset.
The agent analyzes your image resolutions, object scale, and hardware profile, then applies suitable prefilters and balanced augmentation ranges automatically.
💡 Learn more in the Prefilters guide and Augmentations guide.
Step 6: Train the Model
With the dataset, labels, hardware profile, and preprocessing configured, you are ready to train.
Ask the agent to create a model instance and start training:
Create a new model "A1" and start training for 30 minutes.
The agent creates model instance A1, uploads the training configuration, and starts cloud training. You can track loss curves, mAP (mean Average Precision), and validation metrics in real time in the ONE AI dashboard.
💡 For training options, architecture selection, and convergence tips, see the Training Guide.
Step 7: Export the Model
Once training finishes, export the model into an inference engine format ready for deployment. For local PC execution, ONNX is the standard choice.
Prompt the agent:
Create an ONNX export and download it.
The agent triggers the export job, compiles the model, and downloads the resulting .onnx file directly into your workspace.
💡 Discover other supported export formats (TensorRT, OpenVINO, TFLite, VHDL) in the Export documentation.
Step 8: Test Live in the Camera Tool
Verify your model's real-time accuracy using the built-in Camera Tool.
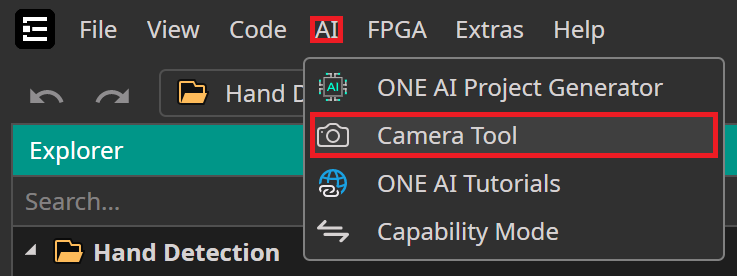
1. Open the Camera Tool
In the top menu bar, select AI → Camera Tool.
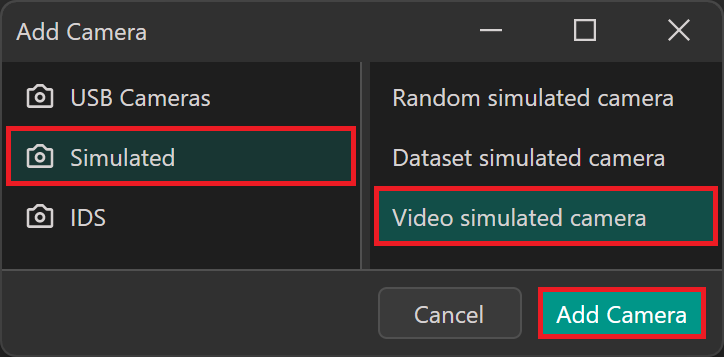
2. Add a Simulated Camera
Click Add Camera, choose Simulated → Video simulated camera, and click Add Camera. When prompted, select your sample video file (pizza_detection_dataset.mp4).
3. Run AI Preview
Switch to the AI Preview tab. Your exported model will be preselected. Click Start Preview.
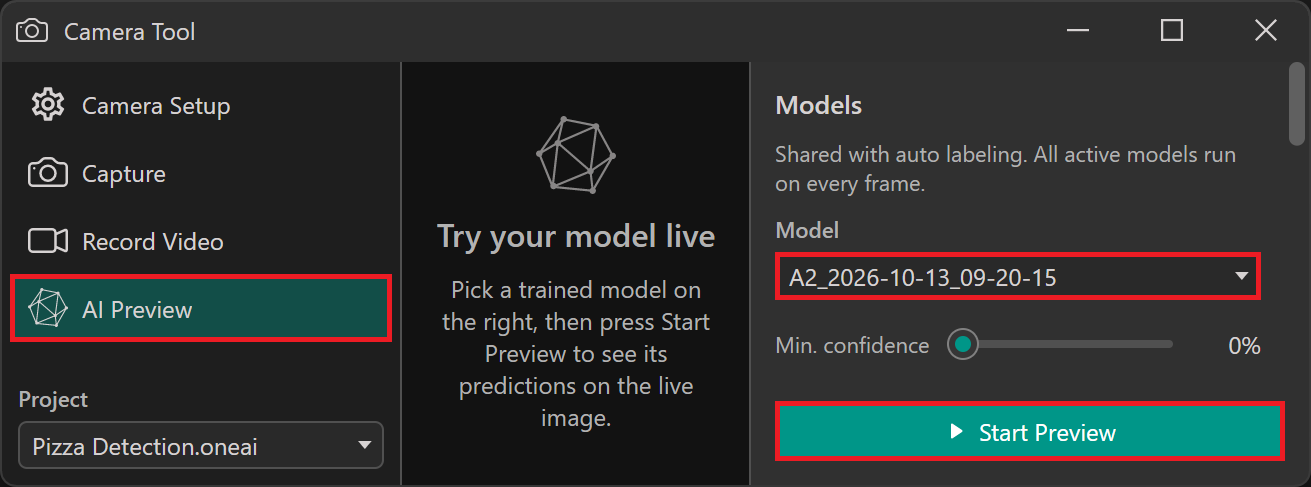
You will see real-time bounding boxes and confidence scores rendered directly over the video frames.
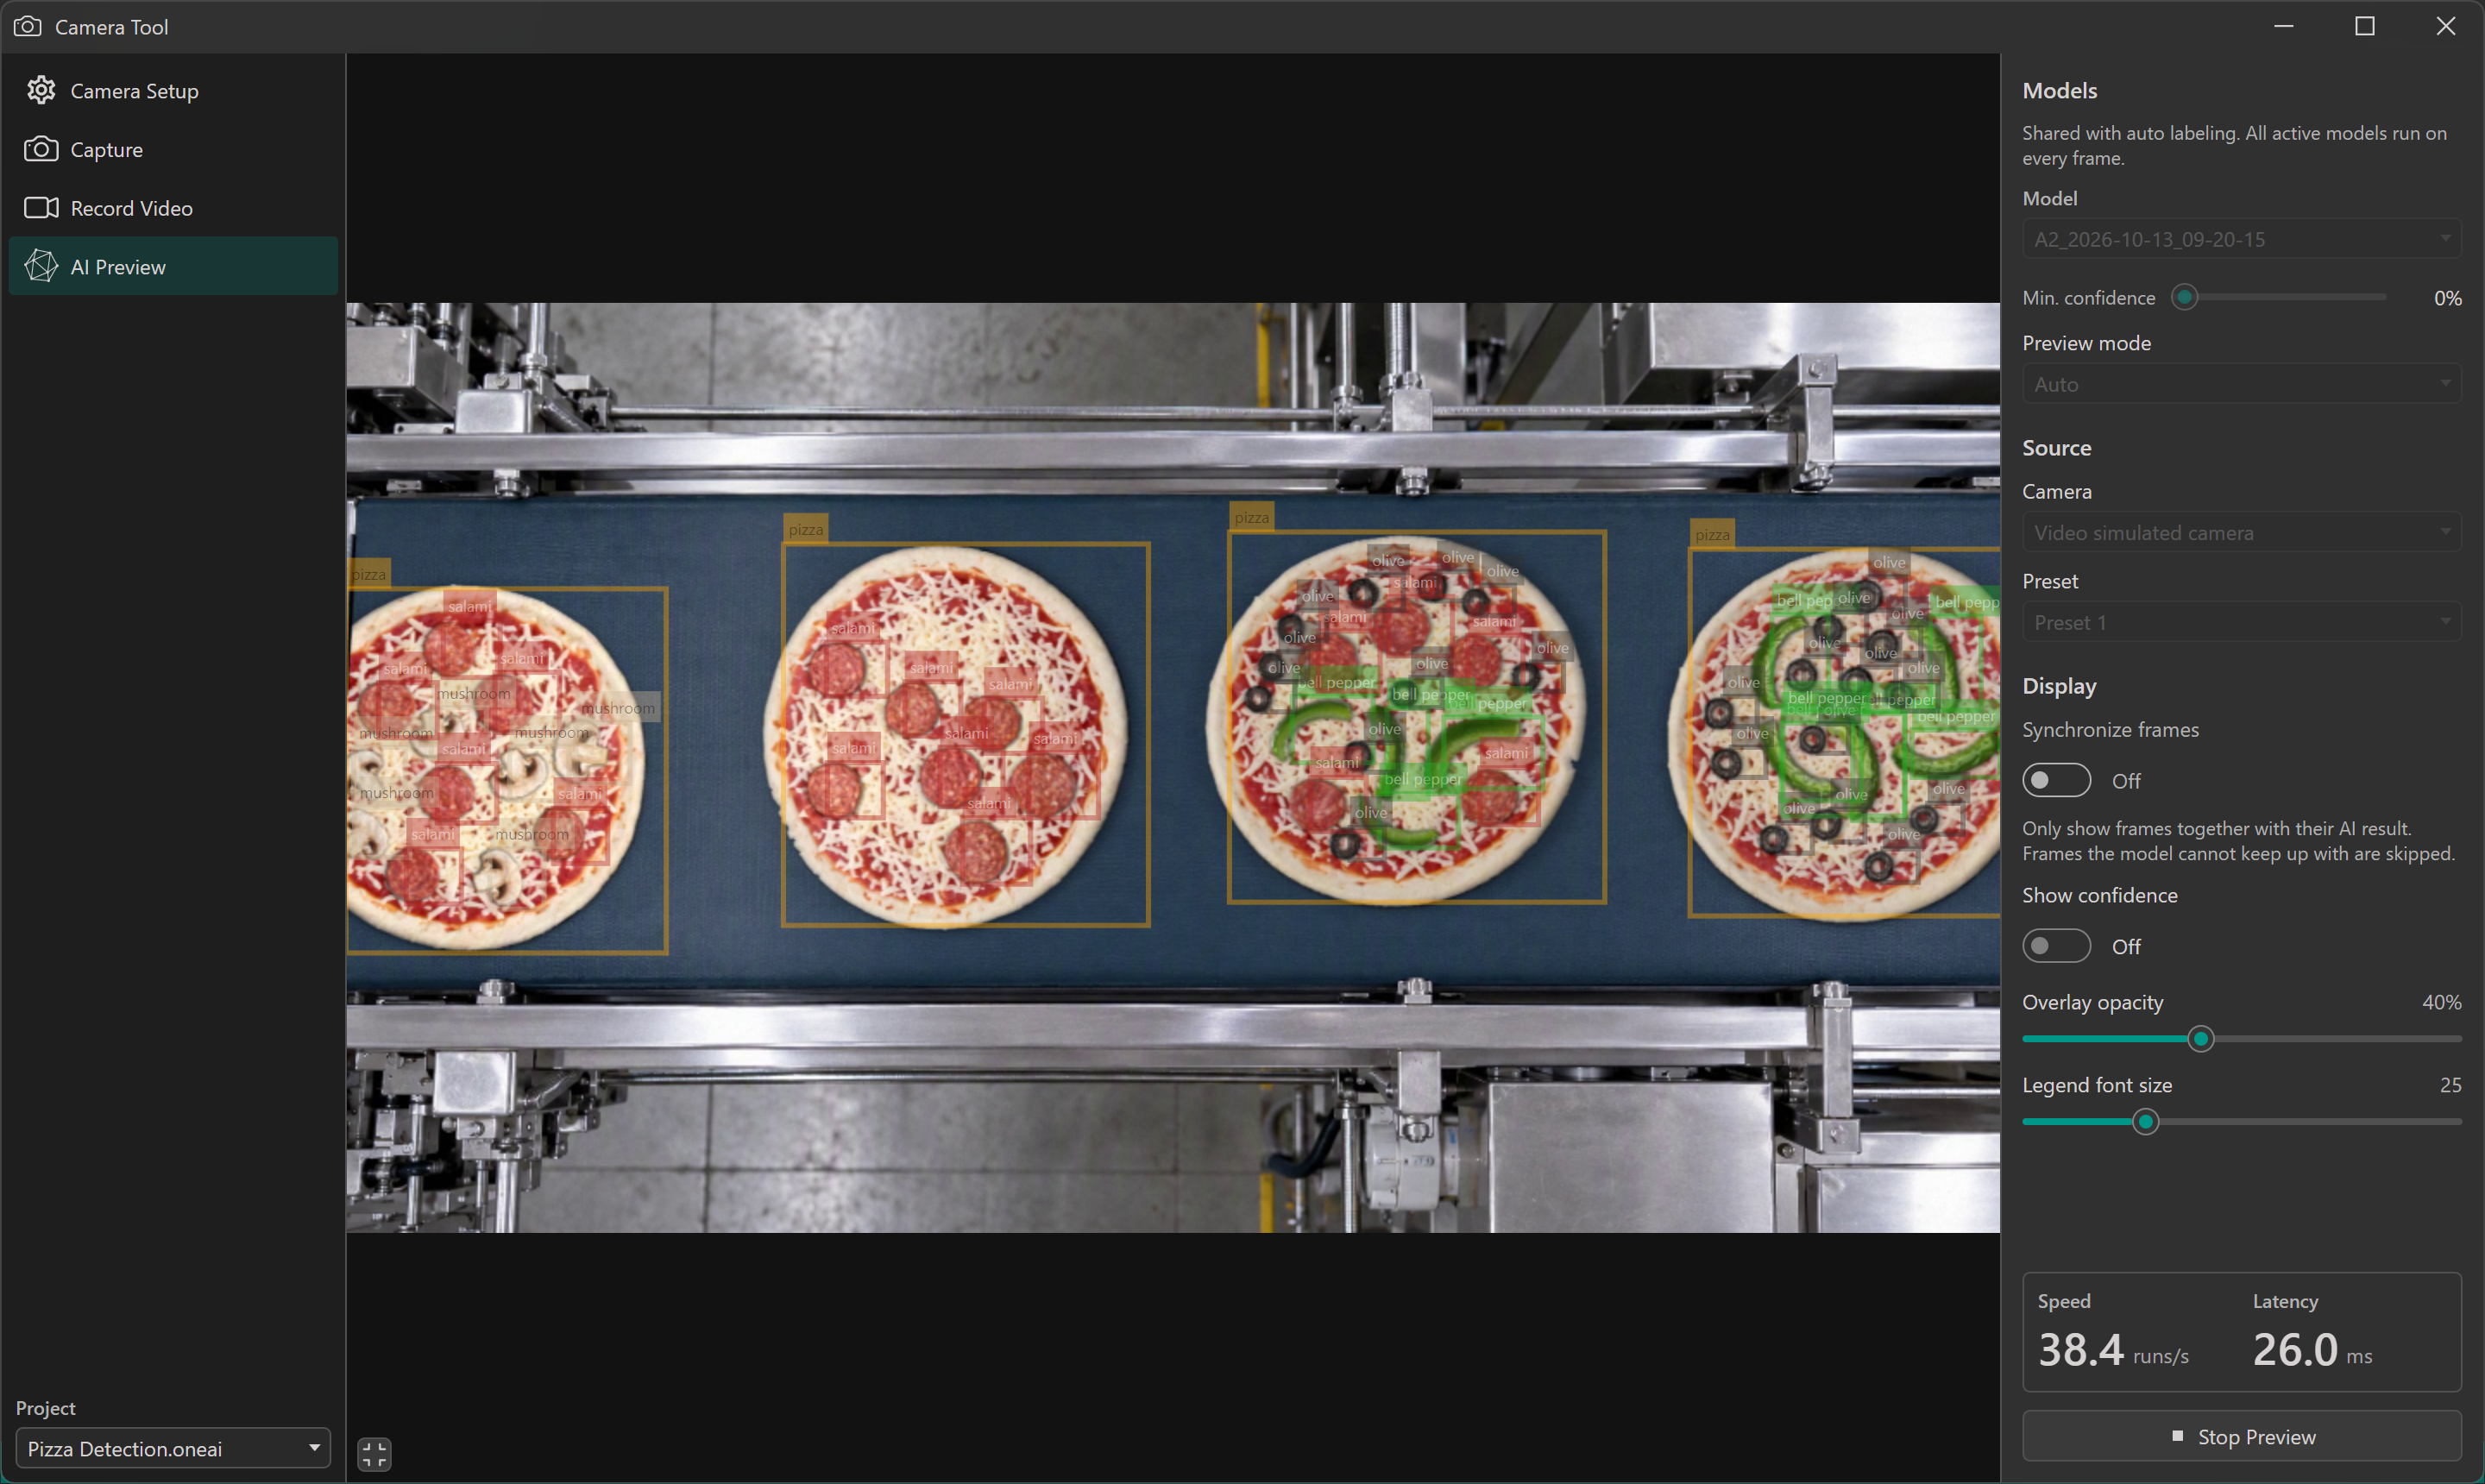
💡 Read more about camera feeds and stream benchmarking in the Camera Tool Overview.
Step 9: Build a Quality-Control UI with Custom Scripts
ONE WARE Agents can also write custom JavaScript automation scripts and UI panels that execute directly inside ONE WARE Studio.
In this scenario, we want an automated quality assurance check: verify that each passing pizza actually has salami, and alert the operator if salami is missing.
Send this prompt to the agent:
Create a custom UI that shows how many items from each label are detected.
If it detects a pizza without salami, the background should be red, otherwise green.
It should only detect pizzas when they are completely visible in the image.
For that, the pizza box should have a margin to the picture border.
As camera, use my dataset source video.
The agent writes the script, binds the camera feed and model output, and opens an interactive UI panel:
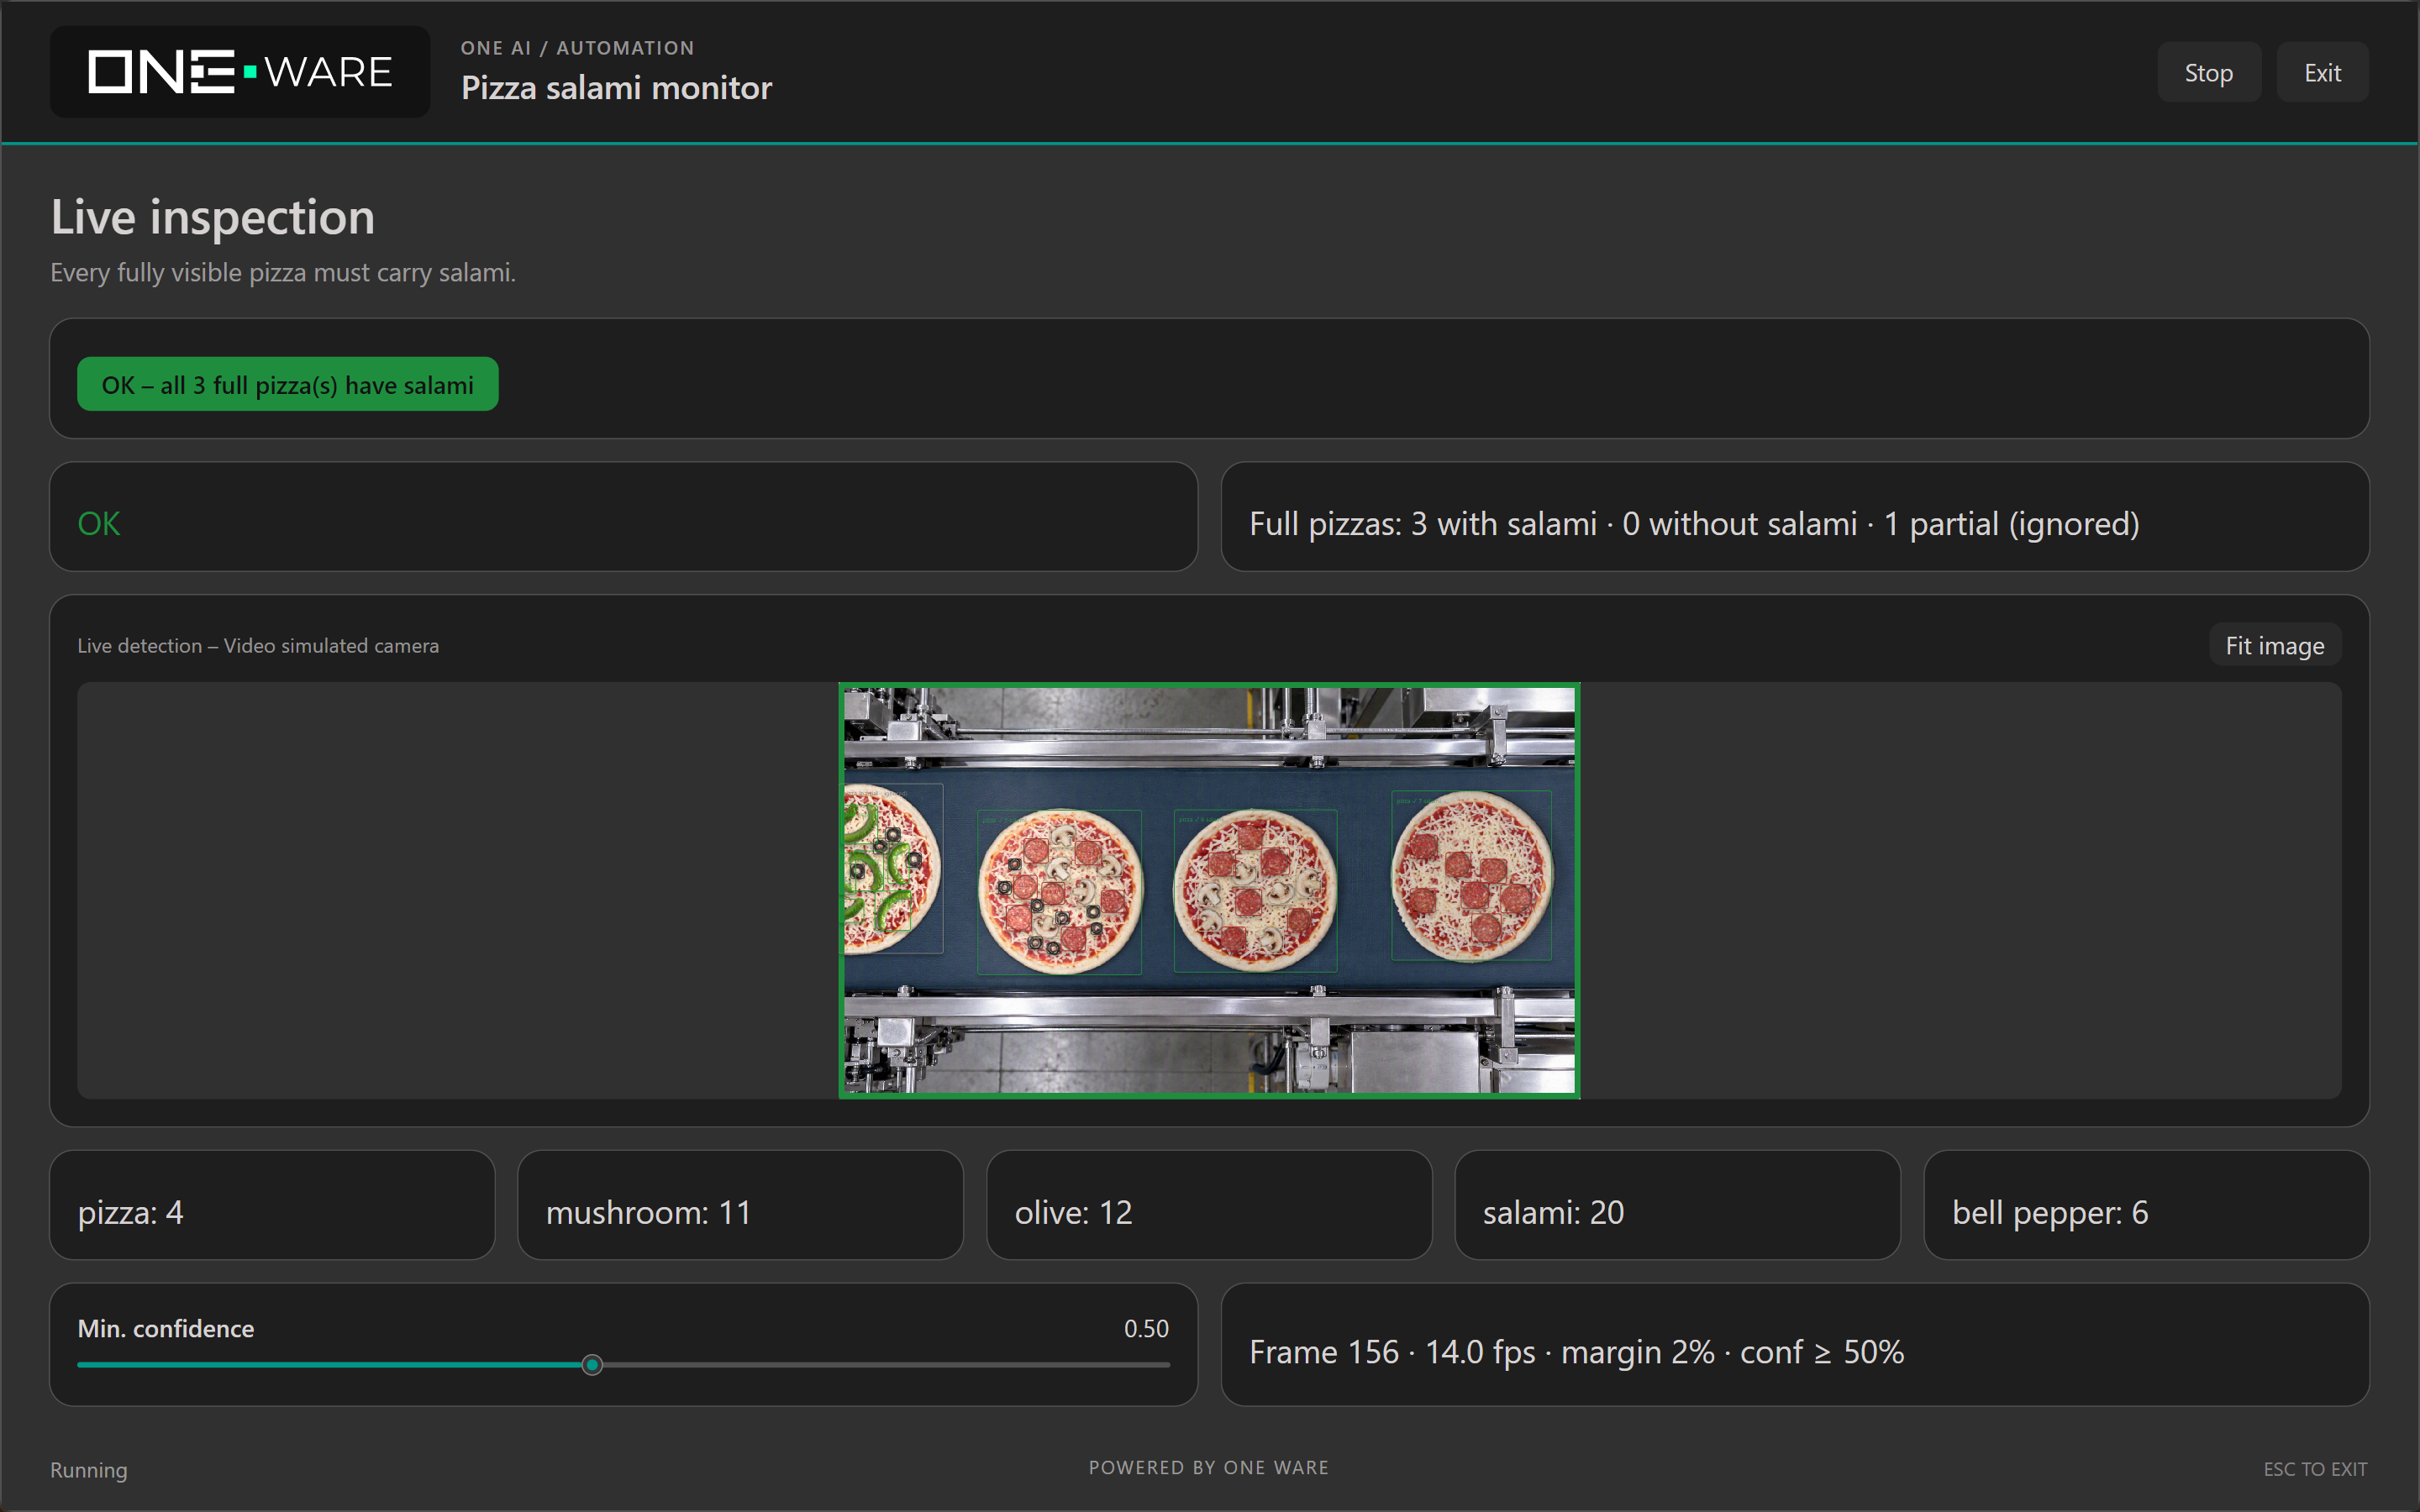
- Quality Check Passed: When salami is detected, the status panel glows green with a live count of all detected toppings:
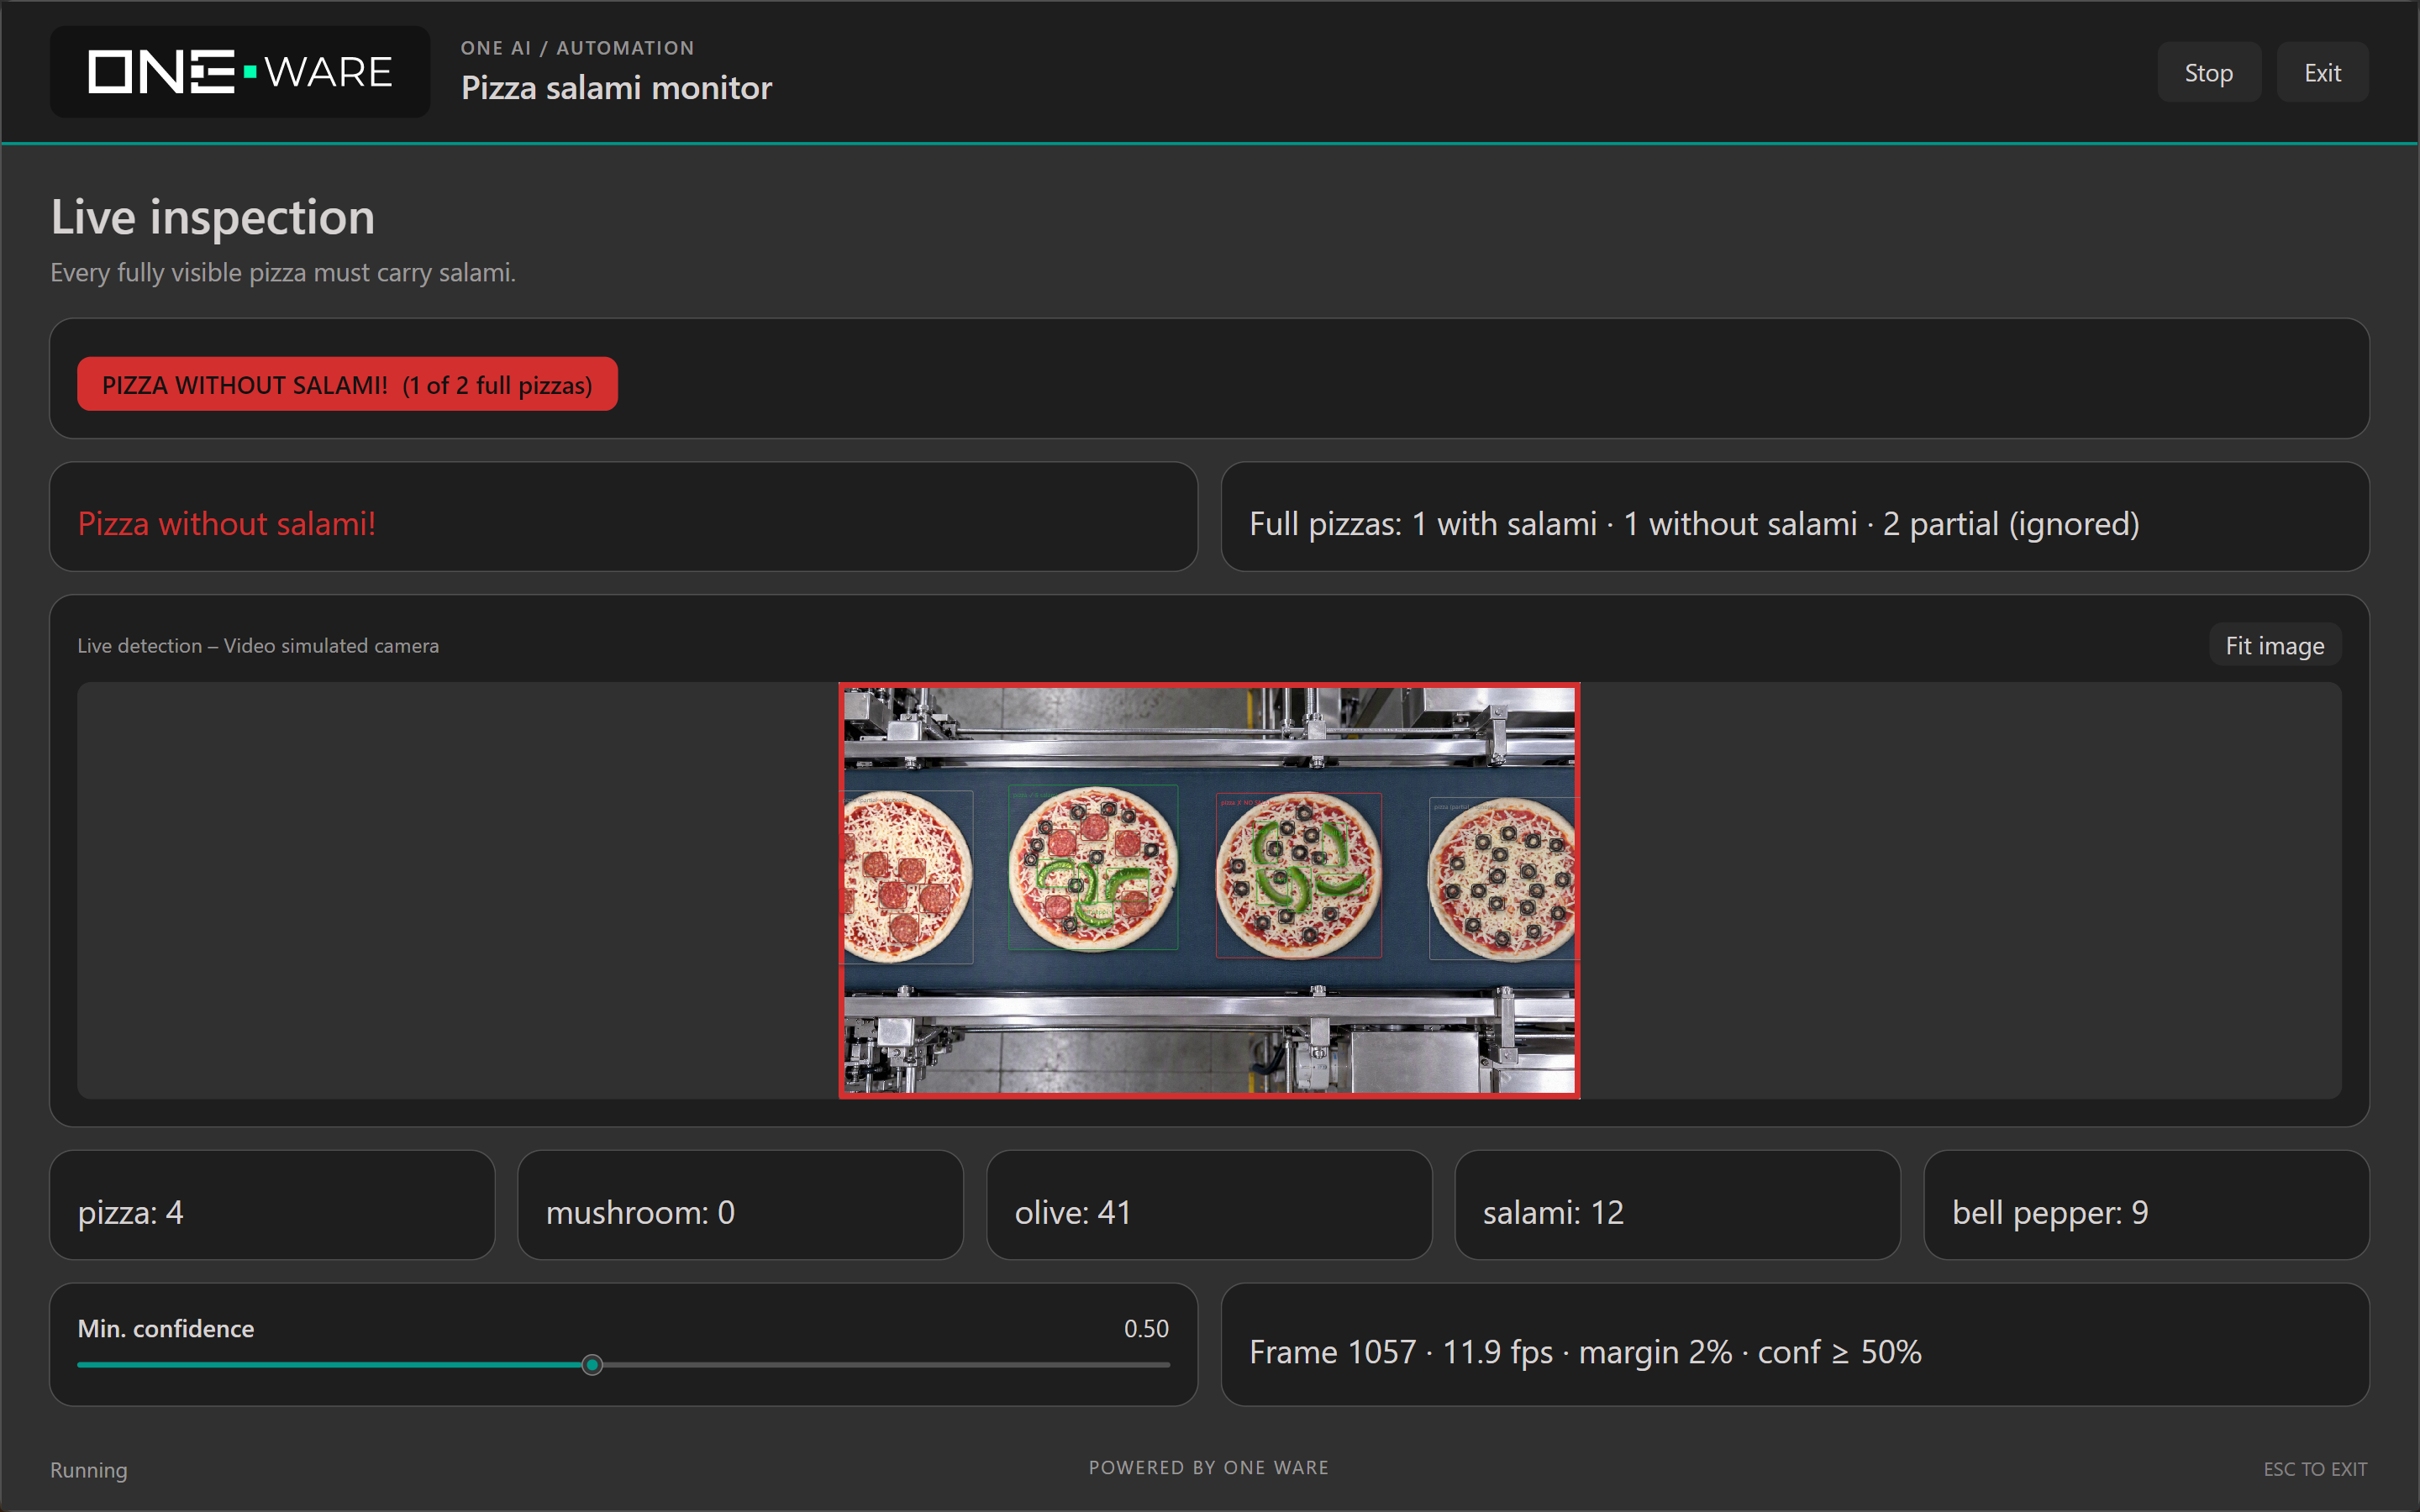
- Defect Detected: When a pizza enters without salami, the panel immediately turns red and alerts the operator:
💡 To explore creating custom dashboards and production automation scripts, see the Scripting Overview.
Summary
In just a few conversational prompts, ONE WARE Agents helped you:
- Initialize and configure an Object Detection project
- Import and structure video frames into training data
- Automatically annotate complex objects with SAM
- Tailor hardware settings, prefilters, and augmentations
- Train and export an optimized ONNX model
- Validate live detections and build a working quality-assurance dashboard
Need Help? We're Here for You!
Christopher from our development team is ready to help with any questions about ONE AI usage, troubleshooting, or optimization. Don't hesitate to reach out!